Jennifoo

Polymer Clay, DIY & Gifts

Sign up for polymer clay tips & DIYs

How to Effectively Clean Your Pasta Machine

April 28, 2022 by jennifoo

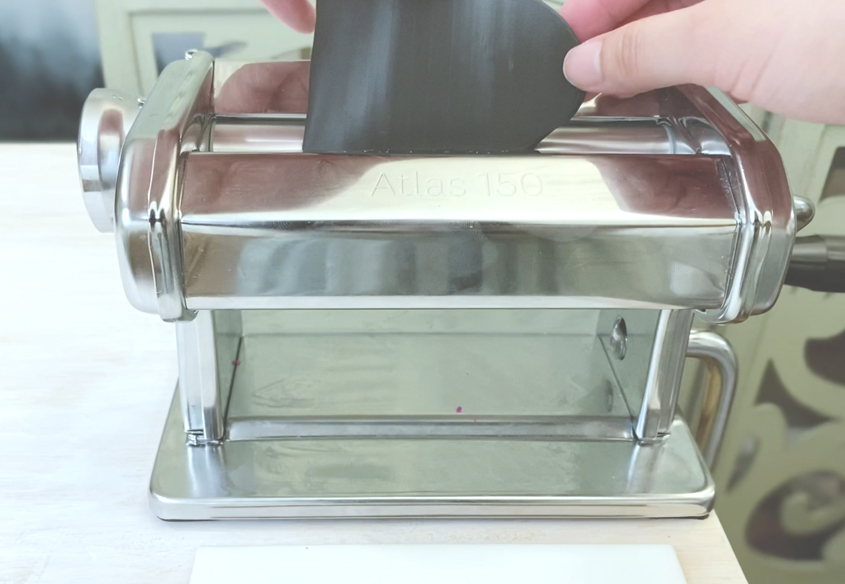
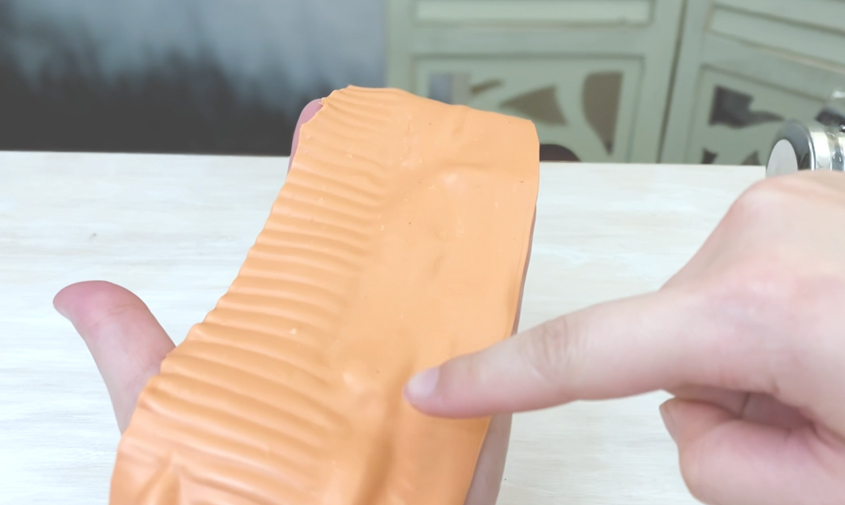
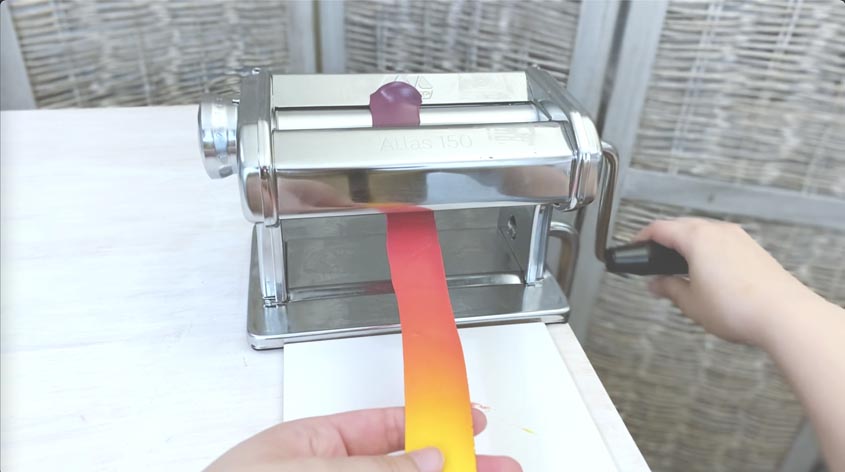
You should be periodically cleaning your pasta machine to remove buildup that accumulates on the rollers and guide blades. Overtime, the plasticizers from clay can cause a chemical reaction with steel rollers resulting in black streaks in your clay. In addition to cleaning your rollers, it’s also important to clean the guide blades because it accumulates clay deposits that can contaminate new colors of clay. 

You may continue reading, but if you’re like me who prefers to listen and see, you can watch in video format:

Subscribe to my Youtube Channel for daily videos here.

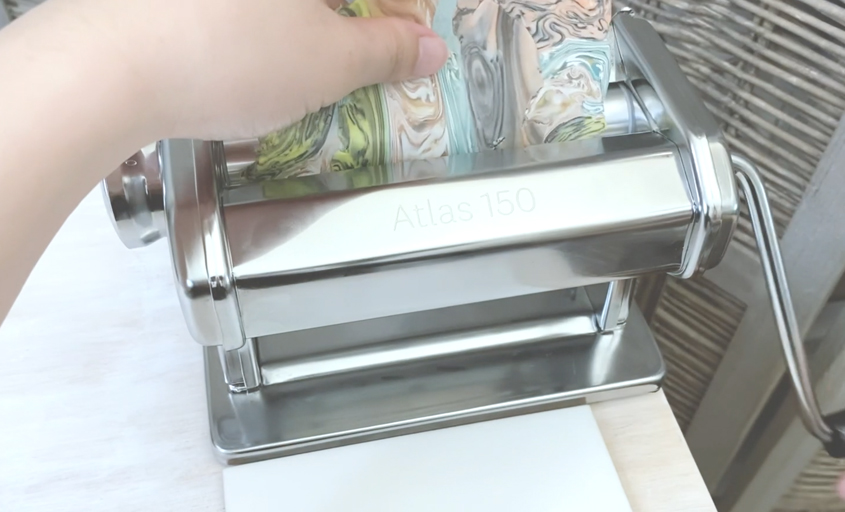
Clean the Pasta Machine Rollers

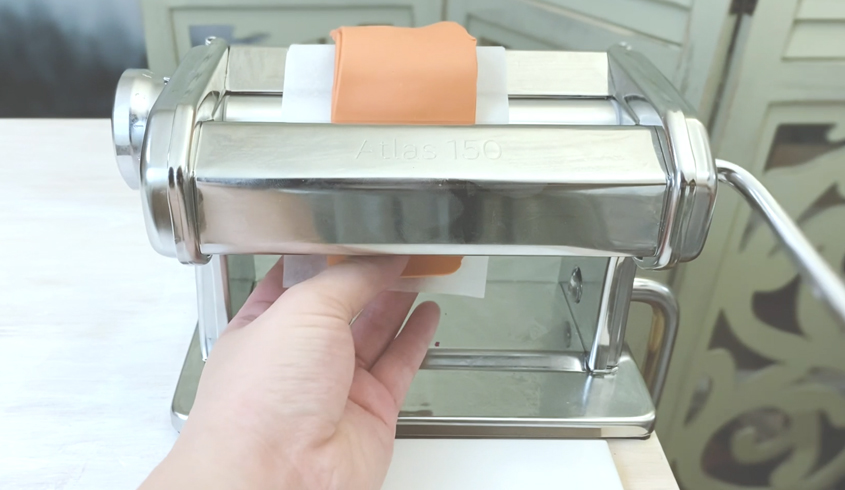
To clean the rollers, grab a paper towel and dab with few drops of mineral or olive oil and wipe the rollers as you crank the handle. You can also clean the body of the pasta machine while you are at it. If you are on a time crunch, you can also use baby wipes to clean the rollers in between different colors of clay.

Clean Pasta Machine Guide Blades

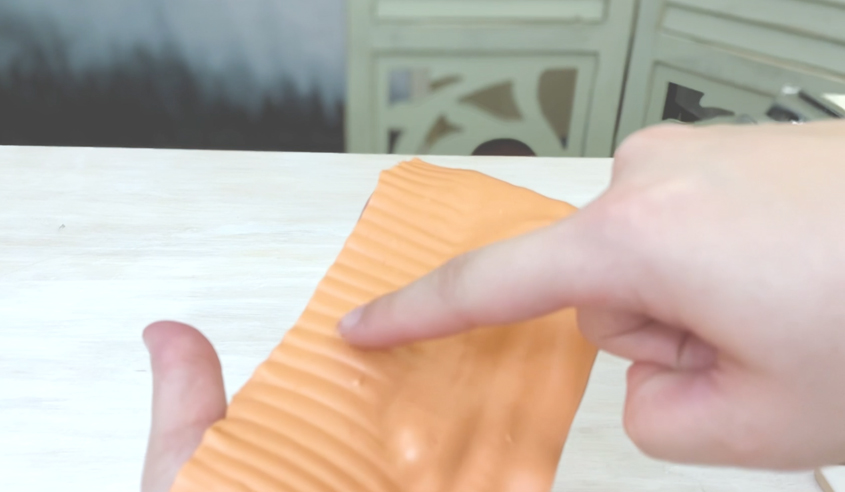
To clean the blades turn your machine over and you should see two guide blades beneath each roller. Guide blades help lift the flattened clay off the rollers. Stickier clays tend to increase the level of buildup that occurs. The bottom guide blade usually has the most clay deposits, but the top one can sometimes have it too.

running q-tip allow pasta machine guide blade

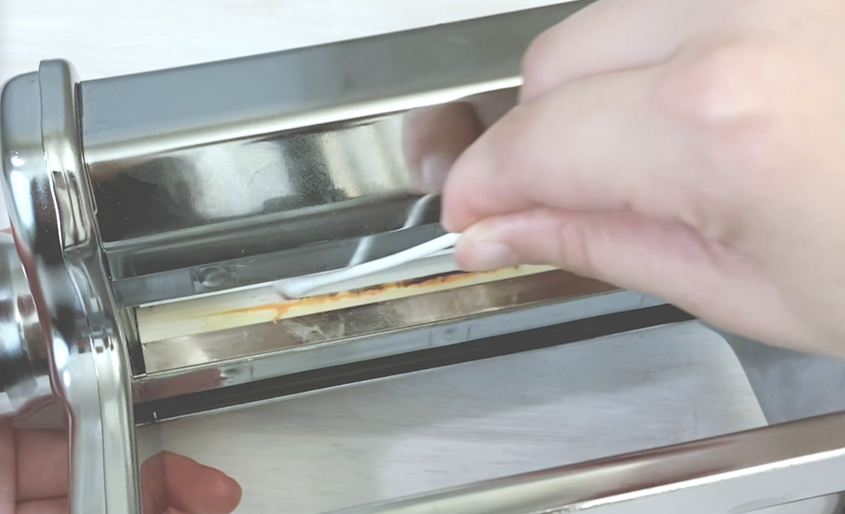
Use either baby wipes, toothpicks, or a Q tip with a little oil to run it along each blade to remove the buildup. Normally, right at the tip of the guide blade is where you’ll see the clay deposits (I usually run a toothpick along that area to loosen it up bits of clay), then follow with a Qtip. It helps if you already cleaned the rollers with oil, because some of that drips down to the guide blades making it easier to clean. You can also clean the top guide blade by wiping it with a paper towel.

After cleaning the guide blades, crank your machine to wipe the blades again with a dry paper towel since some of the residue you removed from the blades may have rubbed onto the rollers and don’t want to leave too much oil on the surface either.

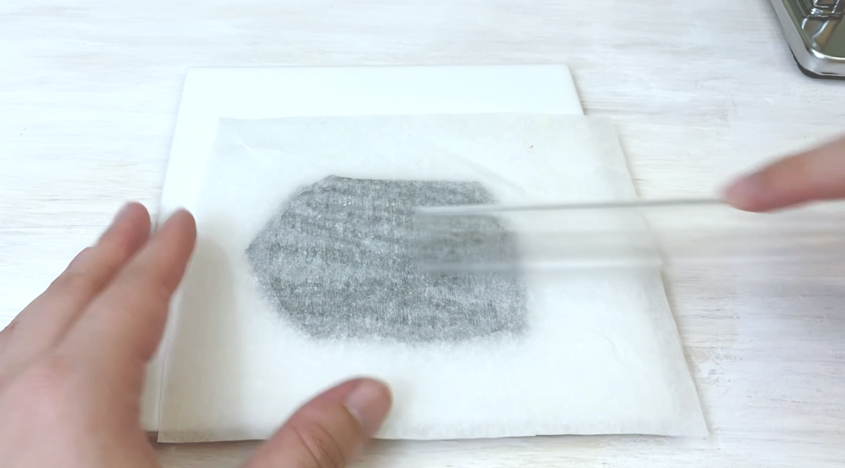
Then follow by repeatedly rolling a large sheet of scrap clay though the machine to pick up any loosened bits of clay.

running scrap clay through pasta machine

Additional Pasta Machine Care Tips

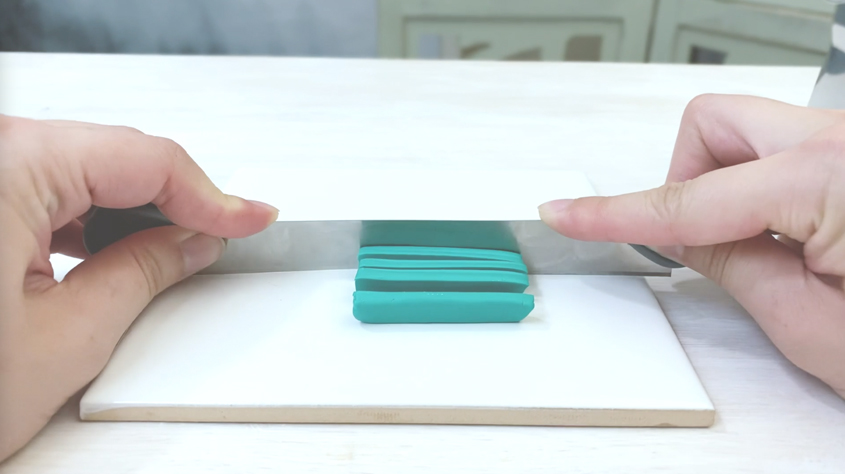
In order to reduce the amount of time spent cleaning your machine between different colors of clays, it’s recommended to start with light to dark clays. Also using firmer clays will reduce the amount of clay deposits. And if you have the budget, have two pasta machines — one for lighter and one for darker colors.

Read this guide on how to properly care for your pasta machine to reduce wear and tear, and avoid permanent damage: Ultimate Pasta Machine Care Guide (Tips & Tricks)

Did you find this helpful? Get notified of new content releases:

Sign up for News or Notifications

Playlist on Polymer Clay Beginner Tutorials

Playlist on Polymer Clay Cane Tutorials

Filed Under: Beginner Polymer Clay Tutorials

Cute, Classy & Chic Gifts Guide (Classy Gifts She’ll Love)

April 28, 2022 by jennifoo

She embodies the three C’s: cute, classy and chic. Chic gifts should keep up with her lovable and sweet personality.

This guide is specially curated with over 15+ various classy & chic gift ideas for your gal. Every item in this gift guide have links to purchase which make it convenient and hassle-free to purchase the item that you want. If you find something nice, feel free to treat yourself with a gift as well! If not, hopefully you will walk away inspired with more ideas about what to get her.

images of various chic gifts ideas for her
Chic Gift Ideas (if you see something you like, scroll below and click the item you want to order)

Disclaimer: This post contains affiliate links, which means I may earn a commission if you choose to make a purchase through my link (with no extra cost to you). Thank you for your support.

Links to purchase products from image above:

  1. Timeson Women’s V Neck Chiffon Blouse Ruffle Sleeve Ladies Work Shirts Link to Purchase
  2. GRACE KARIN Womens Casual High Waist Pencil Pants with Bow-Knot Pockets for Work Link to Purchase
  3. Briefcase for Women, 15.6 Inch Laptop Tote Bag Durable Messenger Bags (with Detachable Widened Strap) Link to Purchase
  4. COASIS Women’s Chunky Block Heels Open Toe Ankle Strap 3.5 Inch Heeled Sandals Link to Purchase
  5. Jessica Simpson J5512 Metal Chain UV Protective Women’s Square Sunglasses. Glam Gifts for Women, 60 mm Link to Purchase
  6. Home Spa Gift Basket Pleasantly Fragrant Peony Spa Set (contains shower gel, bubble bath, body lotion, peony bath salt and puff in a pink Feminine Tub) Link to Purchase
  7. LA JOLIE MUSE Rose Noir & Oud Scented Candle, Rose Candle Gift for Women, Large Glass Jar Candles for Home, Wood Wick, Long Burning Time, 19.4 oz Link to Purchase
  8. You Got This: 90 Devotions to Equip and Empower Hardworking Women Link to Purchase
  9. White Gold Speckled Jewelry Dish | Ceramic Circle Trinket Tray Home Decor Wedding Gift for Her Desk Organizer Accessories Small Ring Holder Gold Office Decor Link to Purchase
  10. Guess Dangle Earrings made of Hematite/Gold Metal Link to Purchase
  11. Joycuff Inspirational Bracelets – Personalized Gift for Her Engraved Mantra Cuff Bangle Link to Purchase
  12. AJ’s Collection Keep It Simple – Personalized Sterling Silver Initial Monogram and Heart Charm Necklace with Swarovski Birthstone Briolette Link to Purchase
  13. L.A. Girl Beauty Brick Eyeshadow, Nudes, 0.42 Ounce Link to Purchase
  14. Compression Packing Cube Set for Carryon Luggage, Travel Packing Organizers with Laundry Bag for Backpack Link to Purchase
  15. Adjustable Cell Phone Stand, CreaDream Phone Stand, Cradle, Dock, Holder, Aluminum Desktop Stand Compatible With Phone Xs Max Xr 8 7 6 6s Plus SE Charging, Accessories Desk, All Mobile Phones (Rose Gold) Link to Purchase
  16. Bedsure Throw Blanket for Couch – Cream White Versatile KnitWoven Chenille Blanket for Chair – Super Soft, Warm & Decorative Blanket with Tassels for Bed, Sofa and Living Room (Ivory, 50 x 60 inches) Link to Purchase
  17. Floerns Women’s Pearl Sheer Mesh Long Sleeve Tops Blouse Link to Purchase
  18. Color-Block Crossbody Bags for Women Leather Cross Body Purses Cute Designer Handbags Shoulder Bag Medium Size Link to Purchase
  19. DREAM PAIRS Clear Studded Rhinestone Heels for Women Sexy Chunky Block Square Toe Heels Wedding Shoes Low Heels Open Toe Bridal Pumps Sandals Link to Purchase
  20. Vanity Desk with Lighted Mirror – Vanity Table Makeup Vanity with Lights, 3 Color Lighting Modes Adjustable Brightness, 4 Drawers Makeup Table with Soft Cushioned Stool for Bedroom Studio, White Link to Purchase

Check Out Other Gifts For Her (Gift Guides)

I hope y’all enjoyed looking through this gifts for her gift guide and leave with a better idea of what to get her or maybe what to not get her. Check out these other gift guides for a vintage lover in your life, or the free-spirited gal in your life who adores the boho-chic aesthetic.

images of various vintage gifts ideas for her
Find vintage inspired gift ideas for the vintage lover to embrace. She appreciates attention to detail and things with a fine elegant touch.
View Vintage Gifts Guide
images of various boho gifts ideas for her
The bohemian gal is a free spirit. Boho gifts should reflective of her radiance and inspire positive energy.
View Boho Gifts Guide

Filed Under: Gift Guides

Vintage Gifts Guide (Elegant Gifts For Her)

April 28, 2022 by jennifoo

Find vintage inspired gift ideas for the vintage lover to embrace. She appreciates attention to detail and things with a fine elegant touch.

This specially curated vintage gifts guide contains over 20+ ideas for your gal. Every item in this vintage gifts guide have links to purchase which make it convenient and hassle-free to purchase the item that you want. If you find something nice, feel free to treat yourself with a gift as well! If not, hopefully you will walk away inspired with more ideas about what to get her.

images of various vintage gifts ideas for her
Vintage Gifts Ideas (if you see something you like, scroll below and click the item you want to order)

Disclaimer: This post contains affiliate links, which means I may earn a commission if you choose to make a purchase through my link (with no extra cost to you). Thank you for your support.

The first featured vintage gifts option is to get her a classic off-shoulder cocktail/wedding dress.

This vintage dress is soft, thick and stretchy with a high to low hem and flatters the figure and comes in a variety of colors. You can also get her a simple, but gorgeous vintage style backpack or handbag that will pair will with nearly any outfit and can carry a laptop.

1

2

3

4

This neat vintage gifts makeup organizer has an elegant and classic look which will brighten up any room.

This vintage makeup organizer is unique because the brush compartment comes with pearls to hold the brushes up. Next up is a vintage jewelry trinket box with butterfly and flower designs which is great as home decor. For the vintage tea or coffee lover is a gorgeous glass tea cup made with high-quality and lead-free glass that’s strong, durable, and supports your hot and cold beverage drinking needs.

5

6

7

8

For the vintage gifts candle lover, get her a nice high-quality candle from the brand, 1803 Candles.

The candle features vintage lilac scent captures the scent of simpler times drifting across the family farm. It will fill the room from start to end of its life. They are hand-poured with soy wax and have a smokeless, clean burn. Other candles featured the flameless which replicate the flicker of real candles. It’s decorated with a lovely vintage rose pattern. Another option includes a swivel mirror with beautiful antique embossing.

9

10

11

12

She may want to cozy up with a rustic distressed vintage style throw blanket while snuggling on the couch.

It has a botanical design that’ll add charm to your living room. The fringe that won’t unravel in the washer and is made of 100% cotton. For more vintage inspired gifts, you also have jewelry options: a gold metal glass mirror tray to hold makeup or perfume on her dresser. Floral pearl earrings have a nice touch of elegance. Next for a customizable vintage gift, check out the locket necklace that has an engraveable signet area when you open it up.

13

14

15

16

If you’re looking for a truly unique vintage gift, try out this Turkish Ottoman beverage serving tray with stunning ornate patterns.

For the flower lover, get her the perfume, vintage bloom by Jessica Simpson. It has a bright citrus note that transforms into a beautiful musk scent. Other ideas include home decor such as beautiful glass soap and lotion dispensers.

17

18

19

20

To elevate the room, why not gift her a vintage style vanity table?

It has a gorgeous antique brass-like look with 5 drawers. The table also comes with a foldout mirror to catch all the right angles and a matching stool.

Check Out Other Gifts For Her (Gift Guides)

I hope y’all enjoyed looking through this gifts for her gift guide and leave with a better idea of what to get her or maybe what to not get her. Check out these other gift guides for the cute/class/chic gal your life, or the free-spirited gal in your life who adores the boho-chic aesthetic.

images of various chic gifts ideas for her
She embodies the three C’s: cute, classy and chic. Chic gifts should keep up with her lovable and sweet personality.
View Chic Gifts Guide
images of various boho gifts ideas for her
The bohemian gal is a free spirit. Boho gifts should reflective of her radiance and inspire positive energy.
View Boho Gifts Guide

Filed Under: Gift Guides

Ultimate Pasta Machine Care Guide (Tips & Tricks)

April 27, 2022 by jennifoo

Read this before using a pasta machine for clay.

Nearly all clay work can be done with an acrylic roller, but a pasta machine reduces the amount of laboring and time needed to do numerous tasks and techniques.

In this guide I talk about some tips for caring & handling your pasta machine which will reduce wear and tear — allowing your machine to last much longer — and I will go over how to deal with 5 of the most common issues you might face when working with one.

You may continue reading, but if you’re like me who prefers to listen and see, you can watch in video format:

Subscribe to my Youtube Channel for daily videos here.

Pasta Machine Care:

My first tip, is be gentle with your pasta machine:

A good rule of thumb is to avoid rolling clay that is more than double the thickness of any setting on the dial of your pasta machine. Forcing too much clay through any setting can result in permanent damage to your pasta machine over time. You will know if this has occurred if clay consistently sticks to the rollers on the thinnest settings. This is an indication that the guide blades beneath may be bowed or that the alignment of the rollers might be compromised. This causes a gap that prevents the blades from lifting the clay off of the rollers.

To prevent pasta machine roller damage, slice your clay into thin sheets and then roll it through your machine through the largest setting. You may have to pick up small pieces and stick them back together and keep running it through the rollers. Gradually reduce the thickness settings to speed up the conditioning process. The reason for this is that the thinner settings help work more surface area. You can feed it again by folding it in half or folding the sides, I personally do a combination of both. Just be sure to make sure the folds are never at the top to avoid air bubbles.

slicing turquoise clay into smaller pieces

If the clay crumbles when rolling, knead crumbled pieces a bit with the warmth of your hands or do some initial rolling with your acrylic roller.

rolling brittle fushia clay with a roller

1. Horizontal Streaks/Ridges

Horizontal Streaks or Ridges — Almost all pasta machines may show some horizontal ridges in your clay. It may be hard to see, but sometimes you’ll see faint colorless horizontal steaks in your sheets of clay due to the clay rubbing against the rollers. And it’s usually not noticeable after the baking, sanding and polishing process. However, they may be more likely to show if you’re using the thickest or thinnest settings of your pasta machine.

horizontal streaks on black clay

Also, these lines may get more pronounced as your machine wears out overtime, especially through rough handling of your pasta machine. However, if the lines do bother you, here are two things you can do.

  1. After you finish rolling your clay, rotate your clay at a 90 degree angle and feed it through the machine again, this should reduce the appearance of those horizontal lines.
    black clayed turned 90 degrees placed into pasta machine
  2. The second option is to place a sheet of parchment paper on top of your clay and smooth it by burnishing your acrylic roller back and forth. This does not mean to roll the roller, but rather rub the clay in order to smooth out the lines.
    tracing paper on clay being rubbed with an acrylic roller

2. Rippling & Chattering

Another issue you might face is Rippling or Chattering. The image to the left demonstrate the effects of Rippling, where a portion of the clay is being stretched because the clay sticks to both rollers as opposed to one. In the image to the right show the effects of chattering which occurs when clay sticks to the blade and releases after pressure builds up and then sticks to it again.

finger pointing to clay rippling
Effects of Rippling on Clay
pointing to chattering on orange clay
Effects of Chatting on Clay

Both issues often occurs on a thinner setting when using overly sticky clay. To resolve this, you could use a firmer brand of clay or apply a backing sheet as you roll your clay — I talk about clay firmness of different clay brands in my Polymer Clay Review Tutorial.

orange clay backed with parchment paper being rolled through pasta machine
To minimize rippling/chattering you can back your clay with parchment paper or sandwich it between two sheets while rolling it through the pasta machine.

If the rippling issue is caused by wear and tear on your machine, using two machines can alleviate this problem by using the compromised one for more intensive things like conditioning & color mixing, while the other for passing through final sheets through thinner settings.

3. Black Streaks

Black Steaks is another common issue that can occur. Overtime, the steel rollers of your pasta machine may have a chemical reaction with the plasticizer in the clay. This can cause black vertical streaks of oily-looking residue on your clay which tend to show up along the outside edges or on the rollers itself. This can be prevented by periodically cleaning your rollers.

4. Scratched Rollers

To avoid Scratched Rollers — avoid putting any clay containing inclusions through your machine. Inclusions like glitter may get stuck all over your machine and become near impossible to remove. Other inclusions may get struck on the blade. You can remove them by running a sheet of baby wipe through the rollers. At worse, inclusions might scratch your rollers or you may end up with a nicked blade (which might be smoothed out using sandpaper, however, it would involve disassembling your pasta machine).

5. Pasta Machine Crank Dropping Off

And lastly, if your pasta machine handle keeps falling off, please note that it’s not you, this is a common problem for many pasta machine users. You can prevent this by putting a bit of duck tape on the handle to help secure it in place. It really depends on your machine, i’ve heard them some like to cut the tip of a rubber glove instead and them jam it in with hammer. But for me a small piece of tape is enough for it to not accidentally fall out, while still making it possible to pull it back out even while there’s some resistance.
tapping black tape on the end of a pasta machine crank

Did you find this helpful? Get notified of new content releases:

Sign up for News or Notifications

Playlist on Polymer Clay Beginner Tutorials

Playlist on Polymer Clay Cane Tutorials

Filed Under: Beginner Polymer Clay Tutorials

Textured Flower Canes (Amazing Gradient Technique)

February 14, 2022 by jennifoo

blue gradient textured flower cane and slices

In my last cane tutorial, I showed y’all how to create textured leaf canes where y’all learned how slicing your clay sheets can produce some intricate looking patterns. And we are going to continue that path with slicing and re-assembling to create other cool effects as you see here. So let’s get started.

You may continue reading, but if you’re like me who prefers to listen and see, you can watch in video format:

Subscribe to my Youtube Channel for daily videos here.

Getting Started with Flower Canes:

  1. Choose Colors for 2 Gradient Bulls Eye Canes
    • First you want to grab two gradient bulls eye canes — one light colored and one dark colored with borders. You can go over to my Bulls Eye Cane tutorial for a quick run down on creating bulls eye canes by clicking this link.

      bullseye cane
    • Your bullseye canes should each be about 1.5-inches long with a diameter of about .75-inches.
  2. Slice Bulls Eye Canes into Quarters
    • Set the canes on their ends. Then cut each gradient bulls eye cane into quarters through the center. All of these pieces will eventually be altered to construct a cane representing a single petal.
      slicing bullseye cane

Forming the Flower Petals

bulleye cane petal shaped
Pinch your flower quarter to get this tapered shape.
  1. Assemble Quarters into a Premature Cane
    • Next work on shaping each quarter into elongated teardrop shapes. Pinch each quarter until you get an elongated teardrop with the lighter end being the tapered point (see larger image above).
    • Next, assemble the four darker teardrops (with lightest color facing inward) in alternating rows against three of the lighter cane quarters to create what i’m calling a premature cane, because it’s not in its final form just yet.
      flower cane loaf being assembled
    • Now, you must be wondering, “what do we do with the stray piece?”
    • Don’t worry, it will be put to good use. Stretch and reduce the remaining lighter-colored teardrop to 1.5-inches long and set aside for the next step.
      gradient flower cane loaf with extra piece
  2. Turn Premature Cane into a Mature Cane
    • At this stage, you should have one premature cane and 1 stray piece.
    • Compress and apply cane reduction to reduce your cane to 3 inches long with your fingers.
    • Next, cut the cane in half to get two identical canes.
      flower cane loaf being cut
    • Take the two canes, and re-assemble them side by side with the stray teardrop piece (that was set aside on the last step) bridging the two halves together creating the mature cane petal.
      gradient flower cane loaf
  3. Mature Petal Cane: Compressing, Shaping & Outlining
    • After you’ve assembled the cane in the previous step, you want to compress the layers of the cane inward to merge the layers and form a square shape. After that, you want to round the edges with your fingers.
      flower cane on table rounding edges
    • Then, roll the cane on a clean clay-safe surface to make it even more round. The next step would involve creating an outline or border around the petal. Take the dark colored clay and run it through the pasta machine. A medium-thin to thin setting should be used for this sheet, depending on how bold you want the outline of the flower to be. Next, wrap the cane petal in the dark colored sheet.
      flower cane log

Flower Cane Assembly

blue gradient flower cane 8 slices
Shows how the textured flower cane looks like after being sliced into 6 pieces.
  1. Mature Petal Cane: Reduction & Flower Assembly
    • In this section, we want to reduce the cane long enough to create components for each petal of the final flower cane.
    • Apply cane reduction to reduce the mature petal cane to 8 inches long (using a series of pinching with your index fingers and thumb, tapping the sides, stretching and rolling techniques). After you’ve reduced the cane, cut off the distorted ends.
    • Then cut the remaining cane into 6 equal sections, so that you have one for each petal of your flower. At this point, my cane is about 7.5-inches long, so I divided each section to 1.25-inches long. To make this process easier, I used a tissue blade to make guide marks for cutting (see large image above).
    • The step next would be to morph each cane section into petal shapes. Pinch the lighter end until you get your a teardrop shape. I like to start on one side then halfway, work on the other.
      gradient flower cane being pinched at the light end
    • And if the pinched ends aren’t parallel, I move them so that they are aligned.
      showing two ends not aligned
    • Then you want to press the tapered-end down against the work surface to slightly flatten it. It might look look a chunky air balloon at this point.
      pointed end of gradient flower cane being pressed against table
    • Next, create a round cane for the core of the flower, you can choose a solid color, or use a bulls eye cane or some other design. This should be about one-third the size of the teardrops.yellow bullseye cane core
    • After that, place the narrow end of the teardrops against the round center cane. I like to group 3 petals together as you see here, add the core, then add the other petals one after the other.
      1 yellow core piece being added to 3 groups of petals
    • You might have a gap at the end, and if that’s the case, you can widen the petals by flattening the end that’s suppose to touch the core. After that, test it out again and you should eventually be able to close that gap.
      6 blue gradient petals surrounding yellow core
      gradient flower cane pointed end being pressed against table
      up close show of textured flower cane with much detail
    • If you have the opposite problem where you can’t fit all of the petals, then the core needs to be widened to give you more room.
  2. Fuse Components Together
    • You should now have a flower cane with all the necessary components assembled together.
    • Lightly compress the cane to compact it and fuse the components together.
    • Now you have your completed flower cane!

What do you do with your flower cane next?

  • If you’d to reduce your cane, you can employ a technique called cane packing with either translucent or background color clay.
    • Cane packing is a process that essentially packs the gaps in free-form shapes like this flower to turn it into a shape that can be easily reduced later on like a circle or square.
    • I will go more in depth into clay packing in future tutorial and will provide a link here once that’s out.

Did you find this helpful? Get notified of new content releases:

Sign up for News or Notifications

Playlist on Polymer Clay Beginner Tutorials

Playlist on Polymer Clay Cane Tutorials

Filed Under: Polymer Clay Canning Tutorials

Super Easy Polymer Clay Canes For Beginners

December 6, 2021 by jennifoo

Create Bulls Eye Canes, Gradient Loaves and Ribbons (Easy Basket Weave Pattern).

bulls eye cane slices arranged in flower pattern
Gradient Bulls Eye Cane Slices

Hi everyone, this is a beginner tutorial on how to create simple canes, loaves and ribbons with polymer clay. In my previous tutorial I walked through how to create a gradient sheets which will be used for the polymer clay techniques in this tutorial. If you haven’t seen that one, it might be really helpful to go over the gradient sheets tutorial first by clicking this link and read it in a separate tab and then come back to this one.

You may read the text below as an outline for what to do, but if you’re like me who prefers to listen and see, you can watch in video format:

Subscribe to my Youtube Channel for daily videos here.

Stretching Gradient Sheets

Before we start on our canes, you want to stretch the sheet. And what I mean is that it’s easier to work with a short wide cane than a long narrow one. Since you can go through a process called cane reduction in order to reduce a wide cane into various sizes in diameter and length. You can always size down in cane circumference, but it’s more trickier to size up.

The purpose of this is to prepare your gradient sheet to become long and skinny as opposed to wide and short. With a long and skinny gradient, you can turn it into a bullseye cane or gradient cane (gradient loaf).

slicing gradient sheet in half
Trim gradient sheet in half
  1. After you’ve created your gradient sheet from Skinner Blends video, trim off some of the edges to make the clay more uniform, then cut the sheet in half and stack one half over the other (see large image above).
  2. Roll the strip through the largest setting of your pasta machine while maintaining control by gently guiding the clay though the rollers. Continue running the clay through the rollers while reducing the thickness setting each time, until you reach the 5th setting. 
    stretching long gradient sheet through pasta machine
  3. Now you have a stretched sheet of clay at the perfect size for canning.

Creating Easy Gradient Cane

Create Gradient Log

yellow log placed on long skinny gradient
Place yellow log onto thin gradient sheet
  1. To create a simple gradient cane, decide on what color you’d like to start off at the center. For this example i’ll start off with the center being yellow and it’ll gradate to mauve.
  2. Also, make sure you place your sheet on the surface as straight as possible which will make the rolling process more even.
  3. This next step isn’t required, but it helps in creating a tight compact roll which is important in preventing trapped air between layers. Roll a thin log and place it at the end of the sheet where you’ll start the core of the cane (see large image above).
  4. Roll the sheet of clay onto the snake being firm, but being careful not to press down too hard that you might distort the clay.
    rolling bulls eye cane

Trim Gradient Log

slicing bulls-eye cane
Trim gradient log
  • The next step would be to trim the opposite ends with a sharp blade. However, it helps if you allow your cane to rest for several hours before slicing so it can regain firmness, making it easier to get clean crisp slices. If you can’t wait, you can freeze your cane for 10 to 15 minutes before cutting. In this video, I didn’t have to time to do either so you’ll see my clay may get pinched in some areas by the pressure of my xacto knife since this is mainly for demo purposes and to show you why it helps to ensure your clay is firm again before cutting.

Cane Reduction

reducing bulls eye cane
Applying Cane Reduction to Bulls Eye Cane
  • After that you want to apply a method called Cane Reduction which reduces the size of the cane, but also helps release air trapped between the layers, prevents the layers from falling apart, reduces internal distortion and gapes in the cane slices. There are various ways to reduce a cane using compression and stretching techniques, but for starters, you can gently squeeze the cane on one end with your index fingers and thumbs while frequently rotating to keep the reduction consistent on all sides.

Now you’ve created a cane that you use to create repeatable shapes. For instance you can morph the shape into a teardrop or petal, then reduce the cane into several different sizes to create flowers or other types of patterns.

Creating Gradient Loaves

Gradient loaves are essentially square canes with a gradient pattern.

completed gradient loaf
  1. To start off, you want to stretch your sheet in the same way you did with canning.
  2. Fold the clay back and forth like an accordion in 1/2″ to 1″ wide intervals. Do not press the clay together too firmly while doing this.
    yellow to white gradient cane folding
  3. Once the clay has been completely folded, gently compress the stack together with your fingers or an acrylic roller to remove any air pockets.
    acrylic roller over gradient cane
  4. Trim the excess clay off at the opposite ends of the strip. You can also trim another side, but leaving one side untrimmed can give you an anchor when slicing the last bit of loaf, giving you more usable clay.
    slicing distorted ends off gradient loaf
  5. Then you can utilize cane reduction to remove any other excess air pockets in between layers of the clay.
    gradient loaf with yellow to white

Gradient loaves can be used as background sheets for small applications. You can also enlarge them by backing them with thicker layers of white clay or connect multiple sheets at 45 degree angles.
slice of gradient loaf

Creating Basket Weave Pattern

Ribbons are gradient loaves, but they give an illusion of a satin ribbon. When you assemble multiple ribbons, you can create the illusion of a basket-woven pattern.

polymer clay basket weave
Basket Weave Pattern Assembled with Ribbons (two gradient slices mirrored together)
polymer clay basket weave pattern up close
Basket Weave Flattened Through Pasta Machine
  • To create a ribbon, you need a gradient loaf that goes from light to dark.
    polymer clay gradient loaf slices
  • Slice the loaf several times and assemble two pieces together so that the lightest sides are facing inward.
    polymer clay gradient ribbon
  • If needed, you can stretch certain pieces and arrange them to create a basket-woven appearance.

Did you find this helpful? Get notified of new content releases:

Sign up for News or Notifications

Playlist on Polymer Clay Beginner Tutorials

Playlist on Polymer Clay Cane Tutorials

Filed Under: Beginner Polymer Clay Tutorials

  • « Previous Page
  • 1
  • 2
  • 3
  • 4
  • 5
  • Next Page »

Quick Links

  • Recommended Polymer Clay Tools & Supplies

Polymer Clay Tutorials

Polymer Clay Canning Tutorials

Beginner Polymer Clay Tutorials

DIY Crafts

white clay earrings adorned with pearls

Shop Gorgeous Handmade Earrings

Recent Posts

  • Dreamy Butterfly Canes & Amazing Clay Hack
  • Easy Peasy Beautiful Feather Canes
  • Fireball Explosion Canes | Easy Cane Tutorial
  • 7 Caning Tips You Need to Know Before Starting
  • How to Enlarge & Connect Polymer Clay Designs
  • Boho Gifts Guide For the Quirky Free Spirit (Gifts For Her)
  • How to Effectively Clean Your Pasta Machine
  • Cute, Classy & Chic Gifts Guide (Classy Gifts She’ll Love)
We use cookies on our website to give you the most relevant experience by remembering your preferences and repeat visits. By clicking “Accept All”, you consent to the use of ALL the cookies. However, you may visit "Cookie Settings" to provide a controlled consent.
Cookie SettingsAccept All
Manage consent

Privacy Overview

This website uses cookies to improve your experience while you navigate through the website. Out of these, the cookies that are categorized as necessary are stored on your browser as they are essential for the working of basic functionalities of the website. We also use third-party cookies that help us analyze and understand how you use this website. These cookies will be stored in your browser only with your consent. You also have the option to opt-out of these cookies. But opting out of some of these cookies may affect your browsing experience.
Necessary
Always Enabled
Necessary cookies are absolutely essential for the website to function properly. These cookies ensure basic functionalities and security features of the website, anonymously.
CookieDurationDescription
cookielawinfo-checkbox-analytics11 monthsThis cookie is set by GDPR Cookie Consent plugin. The cookie is used to store the user consent for the cookies in the category "Analytics".
cookielawinfo-checkbox-functional11 monthsThe cookie is set by GDPR cookie consent to record the user consent for the cookies in the category "Functional".
cookielawinfo-checkbox-necessary11 monthsThis cookie is set by GDPR Cookie Consent plugin. The cookies is used to store the user consent for the cookies in the category "Necessary".
cookielawinfo-checkbox-others11 monthsThis cookie is set by GDPR Cookie Consent plugin. The cookie is used to store the user consent for the cookies in the category "Other.
cookielawinfo-checkbox-performance11 monthsThis cookie is set by GDPR Cookie Consent plugin. The cookie is used to store the user consent for the cookies in the category "Performance".
viewed_cookie_policy11 monthsThe cookie is set by the GDPR Cookie Consent plugin and is used to store whether or not user has consented to the use of cookies. It does not store any personal data.
Functional
Functional cookies help to perform certain functionalities like sharing the content of the website on social media platforms, collect feedbacks, and other third-party features.
Performance
Performance cookies are used to understand and analyze the key performance indexes of the website which helps in delivering a better user experience for the visitors.
Analytics
Analytical cookies are used to understand how visitors interact with the website. These cookies help provide information on metrics the number of visitors, bounce rate, traffic source, etc.
Advertisement
Advertisement cookies are used to provide visitors with relevant ads and marketing campaigns. These cookies track visitors across websites and collect information to provide customized ads.
Others
Other uncategorized cookies are those that are being analyzed and have not been classified into a category as yet.
SAVE & ACCEPT

Get creative inspiration and updates from Jennifoo right to your inbox.