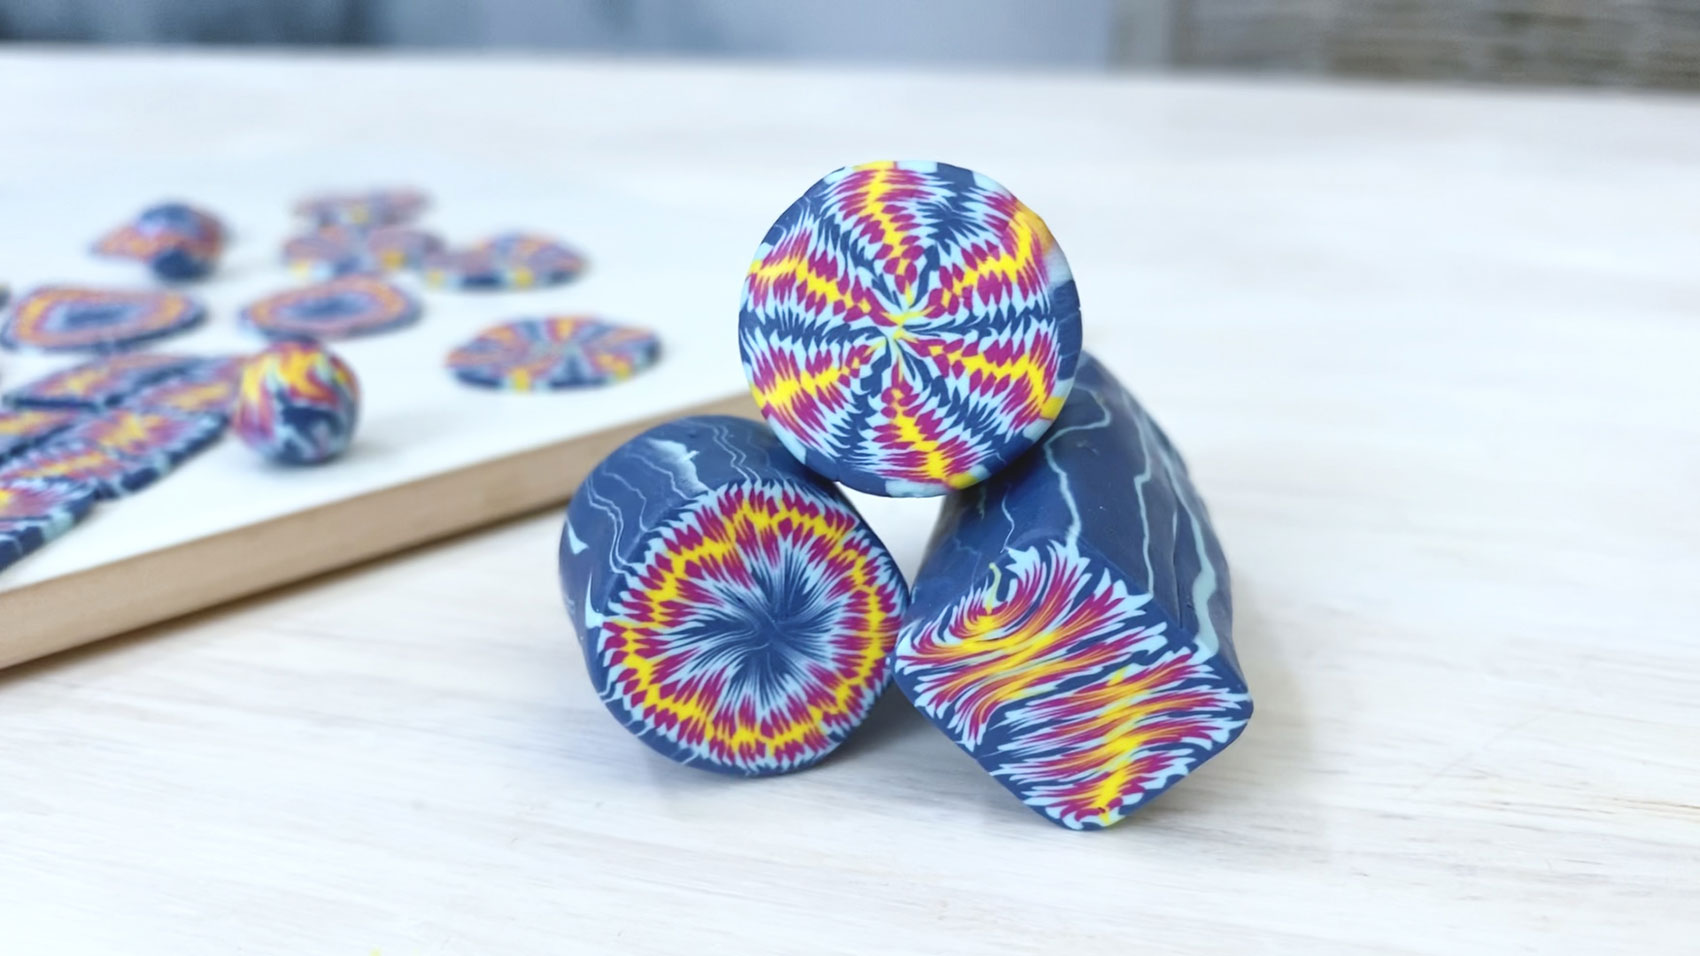
In my last cane tutorial, I showed y’all how to create textured leaf canes where y’all learned how slicing your clay sheets can produce some intricate looking patterns. And we are going to continue that path with slicing and re-assembling to create other cool effects as you see here. So let’s get started.
You may continue reading, but if you’re like me who prefers to listen and see, you can watch in video format:
Getting Started with Flower Canes:
- Choose Colors for 2 Gradient Bulls Eye Canes
- First you want to grab two gradient bulls eye canes — one light colored and one dark colored with borders. You can go over to my Bulls Eye Cane tutorial for a quick run down on creating bulls eye canes by clicking this link.

- Your bullseye canes should each be about 1.5-inches long with a diameter of about .75-inches.
- First you want to grab two gradient bulls eye canes — one light colored and one dark colored with borders. You can go over to my Bulls Eye Cane tutorial for a quick run down on creating bulls eye canes by clicking this link.
- Slice Bulls Eye Canes into Quarters
- Set the canes on their ends. Then cut each gradient bulls eye cane into quarters through the center. All of these pieces will eventually be altered to construct a cane representing a single petal.

- Set the canes on their ends. Then cut each gradient bulls eye cane into quarters through the center. All of these pieces will eventually be altered to construct a cane representing a single petal.
Forming the Flower Petals

- Assemble Quarters into a Premature Cane
- Next work on shaping each quarter into elongated teardrop shapes. Pinch each quarter until you get an elongated teardrop with the lighter end being the tapered point (see larger image above).
- Next, assemble the four darker teardrops (with lightest color facing inward) in alternating rows against three of the lighter cane quarters to create what i’m calling a premature cane, because it’s not in its final form just yet.

- Now, you must be wondering, “what do we do with the stray piece?”
- Don’t worry, it will be put to good use. Stretch and reduce the remaining lighter-colored teardrop to 1.5-inches long and set aside for the next step.

- Turn Premature Cane into a Mature Cane
- At this stage, you should have one premature cane and 1 stray piece.
- Compress and apply cane reduction to reduce your cane to 3 inches long with your fingers.
- Next, cut the cane in half to get two identical canes.

- Take the two canes, and re-assemble them side by side with the stray teardrop piece (that was set aside on the last step) bridging the two halves together creating the mature cane petal.

- Mature Petal Cane: Compressing, Shaping & Outlining
- After you’ve assembled the cane in the previous step, you want to compress the layers of the cane inward to merge the layers and form a square shape. After that, you want to round the edges with your fingers.

- Then, roll the cane on a clean clay-safe surface to make it even more round. The next step would involve creating an outline or border around the petal. Take the dark colored clay and run it through the pasta machine. A medium-thin to thin setting should be used for this sheet, depending on how bold you want the outline of the flower to be. Next, wrap the cane petal in the dark colored sheet.

- After you’ve assembled the cane in the previous step, you want to compress the layers of the cane inward to merge the layers and form a square shape. After that, you want to round the edges with your fingers.
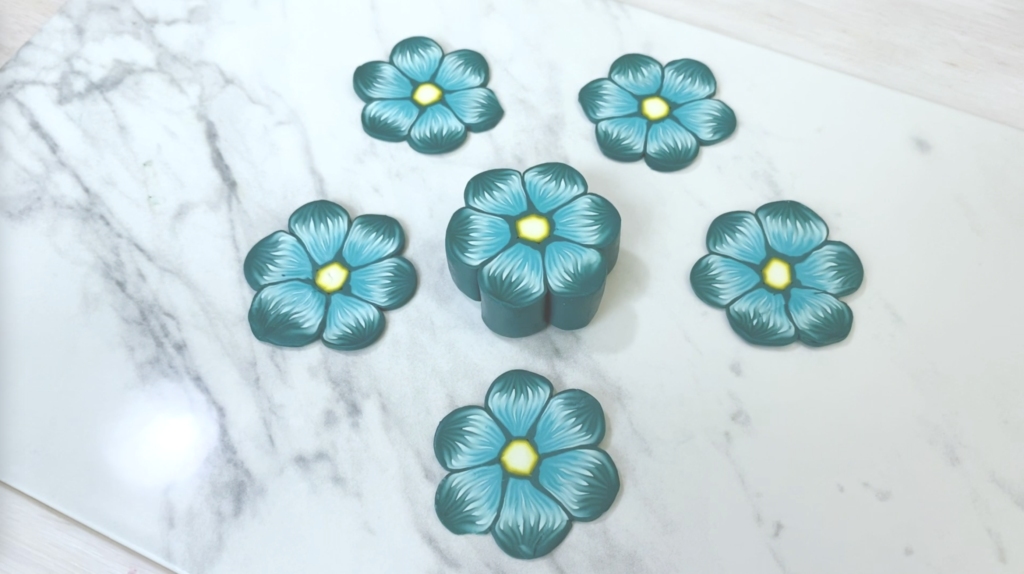
Flower Cane Assembly

- Mature Petal Cane: Reduction & Flower Assembly
- In this section, we want to reduce the cane long enough to create components for each petal of the final flower cane.
- Apply cane reduction to reduce the mature petal cane to 8 inches long (using a series of pinching with your index fingers and thumb, tapping the sides, stretching and rolling techniques). After you’ve reduced the cane, cut off the distorted ends.
- Then cut the remaining cane into 6 equal sections, so that you have one for each petal of your flower. At this point, my cane is about 7.5-inches long, so I divided each section to 1.25-inches long. To make this process easier, I used a tissue blade to make guide marks for cutting (see large image above).
- The step next would be to morph each cane section into petal shapes. Pinch the lighter end until you get your a teardrop shape. I like to start on one side then halfway, work on the other.

- And if the pinched ends aren’t parallel, I move them so that they are aligned.

- Then you want to press the tapered-end down against the work surface to slightly flatten it. It might look look a chunky air balloon at this point.

- Next, create a round cane for the core of the flower, you can choose a solid color, or use a bulls eye cane or some other design. This should be about one-third the size of the teardrops.

- After that, place the narrow end of the teardrops against the round center cane. I like to group 3 petals together as you see here, add the core, then add the other petals one after the other.

- You might have a gap at the end, and if that’s the case, you can widen the petals by flattening the end that’s suppose to touch the core. After that, test it out again and you should eventually be able to close that gap.


- If you have the opposite problem where you can’t fit all of the petals, then the core needs to be widened to give you more room.
- Fuse Components Together
- You should now have a flower cane with all the necessary components assembled together.
- Lightly compress the cane to compact it and fuse the components together.
- Now you have your completed flower cane!
What do you do with your flower cane next?
- If you’d to reduce your cane, you can employ a technique called cane packing with either translucent or background color clay.
- Cane packing is a process that essentially packs the gaps in free-form shapes like this flower to turn it into a shape that can be easily reduced later on like a circle or square.
- I will go more in depth into clay packing in future tutorial and will provide a link here once that’s out.
Did you find this helpful? Get notified of new content releases:
Sign up for News or Notifications