Step-by-step tutorial with lots of pictures of the caning process.
Make gorgeously detailed butterfly canes using a neat trick with a simple old credit/gift card. This tutorial involves some basic knowledge of skinner blending, click here for a walkthrough for how to do that. After making these butterfly canes, you will be rewarded by seeing just how much magic you can work with your hands to turn your colors of clay into life. First, we are going to start with the top wing and then do the bottom wing. So let’s get started!

For the butterfly clay cane tutorial you will need:
- 3oz of black (84g) Black
- 1.5oz of white (42g) White
- .75oz of light blue (21g) Teal
- .75oz of med blue (21g) Purple
- 1.5oz of dark blue (42g) Dark Blue
Create Top Wing of Polymer Clay Butterfly Cane
Step #1: Create Black and White Striped Cane
To start off, condition 14 grams of black clay and 9.33 grams of white clay. Then roll each color on the thickest setting of your pasta machine (for me, it’s 0) to make rectangular sheets. Stack the white sheet on top of the longer black sheet. Trim off the hanging black clay. Cut it in half and stack them on top of one another to create a black and white striped cane.


Next, take the remaining black clay you trimmed off earlier, and run it through the pasta machine’s thin setting number 5. Attach this thin black sheet to the white side of your striped cane.


Step #2: Create Polymer Clay Gradient Cane
For step 2, condition 7g black clay, 11.2g of each of the dark blue, purple and teal clays and 5.6g of white clay. Feel free to switch out these colors with your own configurations. After that, create a skinner blend arrangement as depicted below. Making sure the pieces are held tight together, run through the thickest setting of the pasta machine to also help the piece adhere to one another. Then fold the sheet and run through your pasta machine – repeat this several times until well-blended.


Next, fold the sheet in half for vertical stretching. Run it through the pasta machine lowering the thickness setting a couple times until you get it thin, on my machine, it’s the 5th setting.


After you get a very long and thin gradient sheet, make a gradient cane. Start on the light end and 1 inch folds and keep folding like an accordion. If you have trouble with air bubbles, instead of folding you can slice inch rectangles and continuously stack to get a similar effect.

Step #3: Create Texture with Polymer Clay Caning Hack Using a Card
For step 3, stretch and pull the striped cane so that it’s more similar in size to the gradient loaf. This is to make the proportions more similar for the next step. After that, place the striped cane on top of the gradient cane. Now we’re going to use a neat little card trick, are you ready?

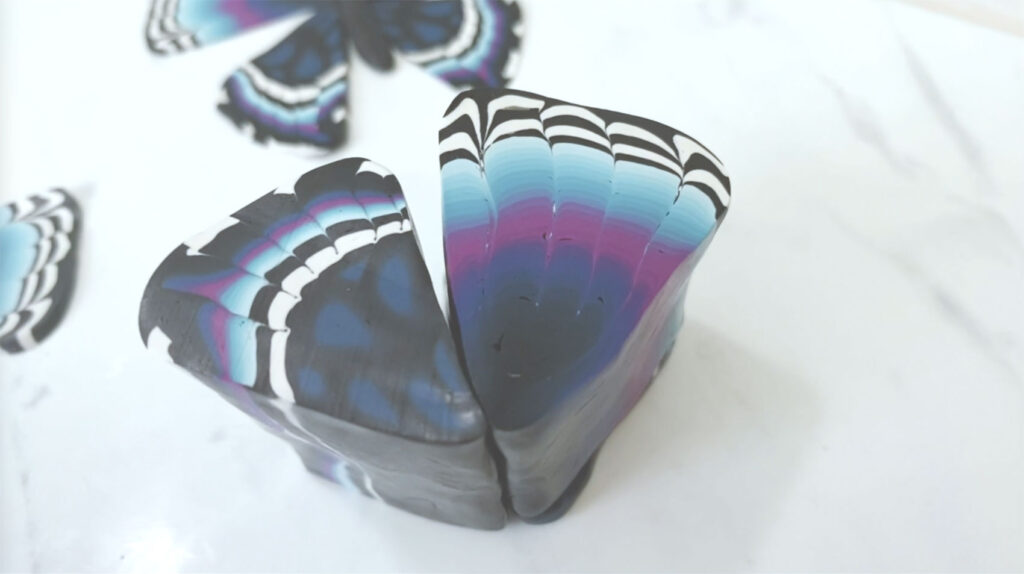
Next, take a thick old store credit card or rewards card and slowly press downward. It’s okay if the clay resists or gets a bit distorted, that’s what you want to happen. Try to go as far as you can, without cutting all the way through. But if you cut all the way through, you can still reattach the pieces together. After that, pinch the gradient end so that you get more of a triangle. A thicker card may give you a nicer more exaggerated effect.


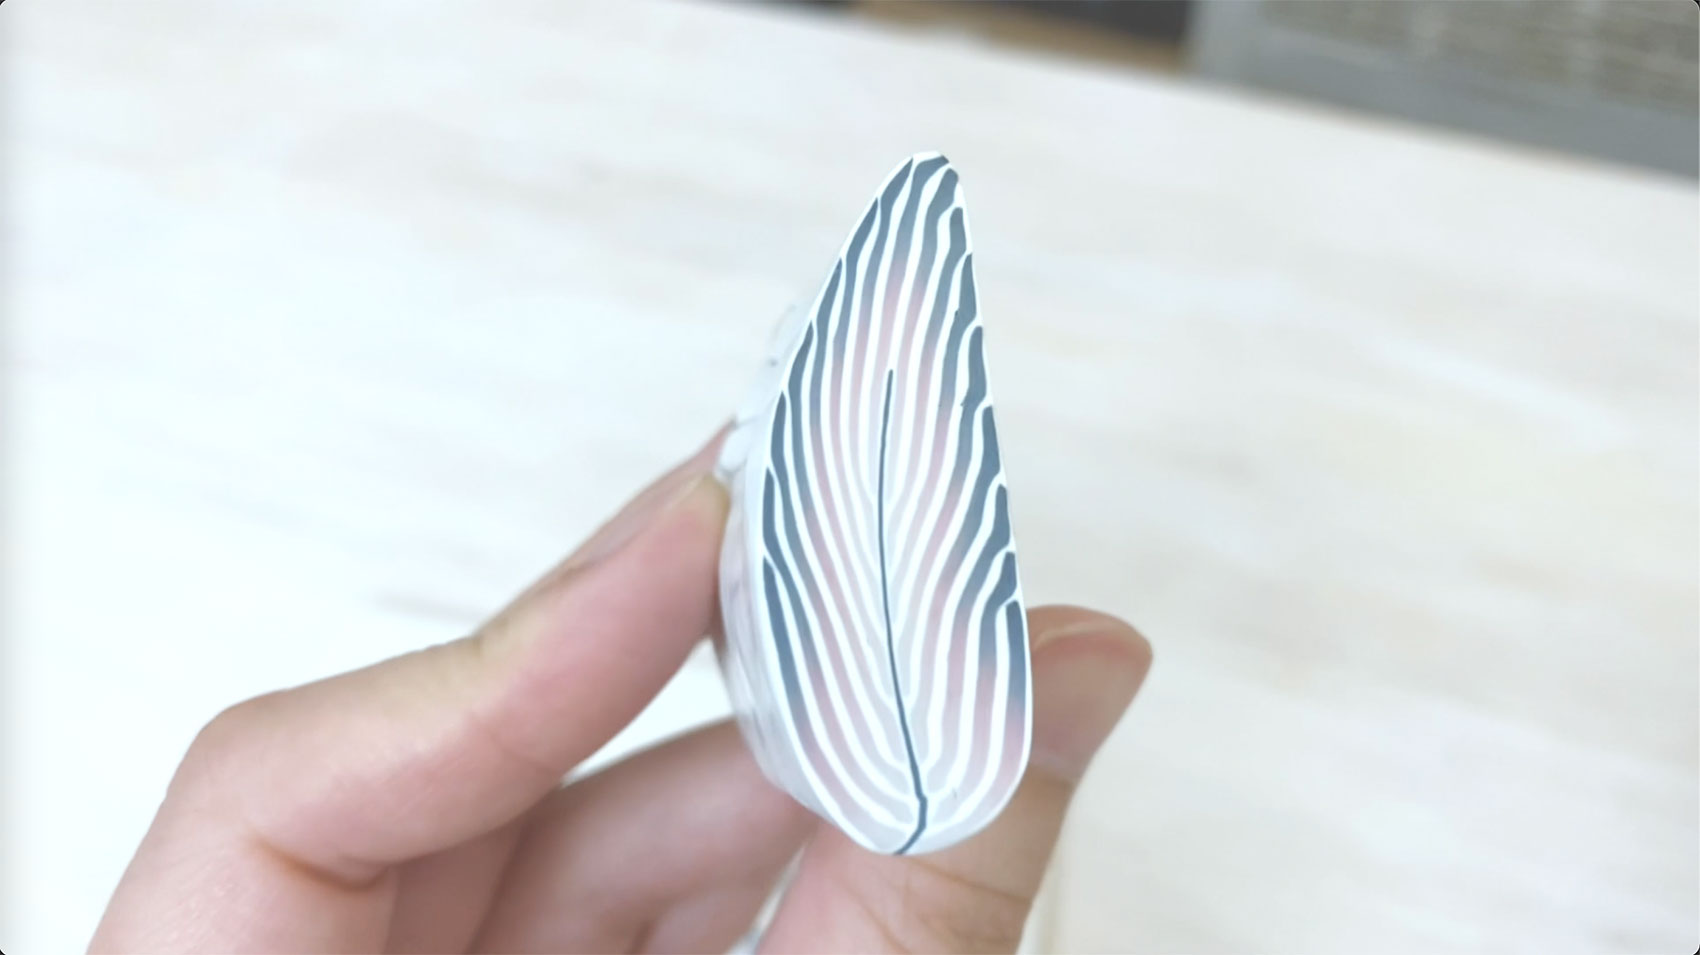
Now you have completed your top wing, and it should look something look this.

Create Bottom Wing of Butterfly Clay Cane
Step #1: Create Gradient Clay Cane
For step 1 of the bottom wing, condition 7g each white, black, teal, purple and dark blue clay. Create a skinner blend arrangement, and run through your pasta machine until well-blended.


After creating the gradient sheet, fold the sheet in half. Run it through the pasta machine lowering the thickness setting a couple times until you get to a thin setting like number 5.


After making a long skinny gradient sheet, make a gradient loaf with 1 inch accordion folds. After that, take an acrylic roller to flatten the loaf to about half a centimeter thick.


Step #2: Add Black and White Polymer Clay Layers
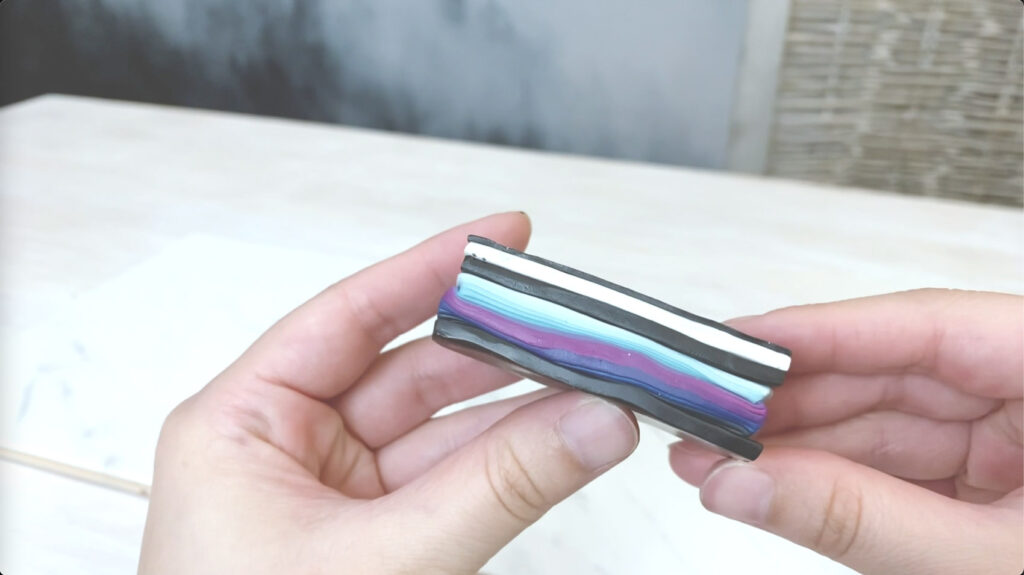
For step 2, condition 28g of black and 14g of white clay. Run both of them through the pasta machine using a thick level, like setting 0 of your pasta machine. Sandwich the gradient loaf with black clay. After that, add a white layer to the bottom. Then run the remainder of the black clay into the pasta machine using a thin setting like setting 5 and add this to the white layer.


Now your polymer clay butterfly cane should have something that looks like this.
Step #3: Create Butterfly Speckled Pattern Using Strips of Black and White Clay
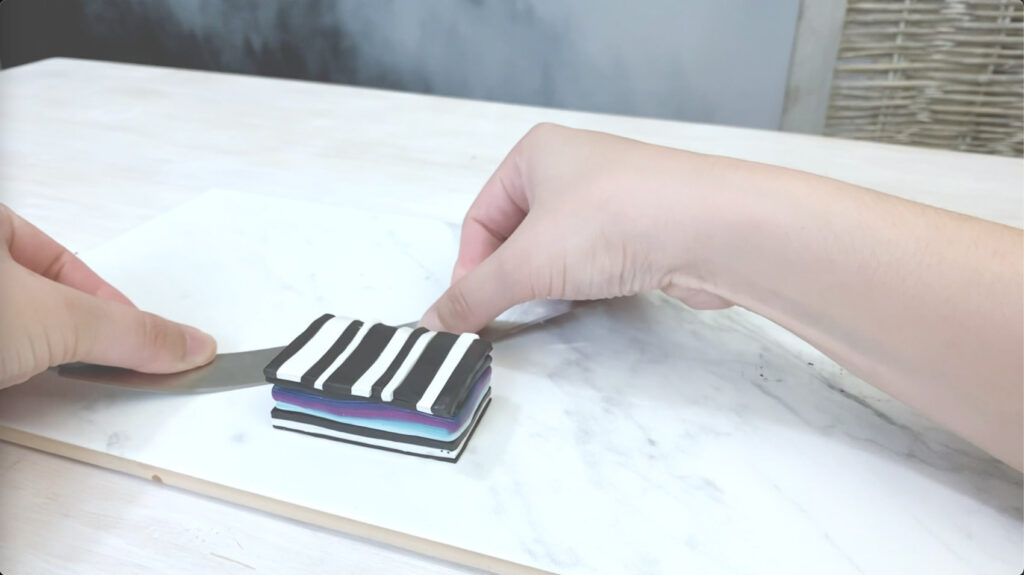
Next, place the cane onto the tile or surface, with the thin black layer side facing down against the table top. After that, run a sheet of white and black clay through setting 0 of the pasta machine. From both the white and black clay, cut out strips in various widths.
After cutting out randomly sized white and black strips, create the look of a random pattern of white specs to the wings. To do this, place white and black strips on top of the gradient cane in your desired arrangement. Trim off the excess clay.


Step #4: Create Clay Texture with Card
For step 4, divide your loaf into 6 or 7 sections. They can be even or vary in width. You can make light marks on your loaf before doing this. Then with an old card. Slowly press down into the clay. Again, try to go as far as you can, without cutting all the way through.

Step #5: Create Bullseye Canes and Make Cool Butterfly Wing Texture
Next, let’s work on filling in the rest of the bottom wing. You should now have about 21g of each of your two darkest colors.
Start by making a gradient with your darker colors that’s offset about an inch. Run it through your pasta machine until well-blended. Fold the sheet in half. And continuously run it through the pasta machine decreasing the thickness until you’re at setting 5 or 6.


Next, start rolling from the lightest to darkest end to create a bulls eye cane. The center may start to ooze out, but that’s okay. Just push those fellers right back in after you finish rolling.

After create a bullseye cane, reduce the cane and make 2 large pieces, 2 medium pieces and 3 smaller pieces. There’s no exact measurement for this.


Then pinch your 2 largest canes to make a teardrop shape.

After that, assemble the canes together into a bundle in no particular order, but have the teardrops point in the direction where you will make the point of a triangle. Compress and fuse the pieces together. Pinch in the direction of the teardrop shapes to create a triangular cane.


Next take the gradient cane and push into it to make it curve slightly. And fit the two pieces together. Compress and reduce the cane to fuse the components together.


Now you have another complete detailed butterfly wing! After that, you have the option of slicing each of your wings in half to assemble into a full butterfly cane. But keeping them separate like this may give you more options for variations and makes it easier to reduce to other sizes.

I hope y’all enjoyed this tutorial and have lots of fun making your own cool butterfly wing patterns. Happy caning!
Here’s a video version of this tutorial to supplement your reading.
Did you find this helpful? Get notified of new content releases:
Sign up for News or Notifications