Jennifoo

Polymer Clay, DIY & Gifts

Sign up for polymer clay tips & DIYs

Dreamy Butterfly Canes & Amazing Clay Hack

March 27, 2023 by jennifoo

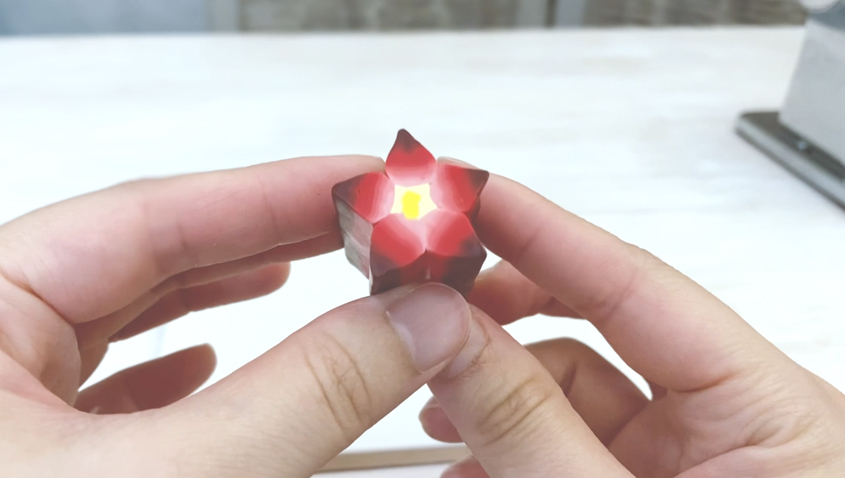
Step-by-step tutorial with lots of pictures of the caning process.
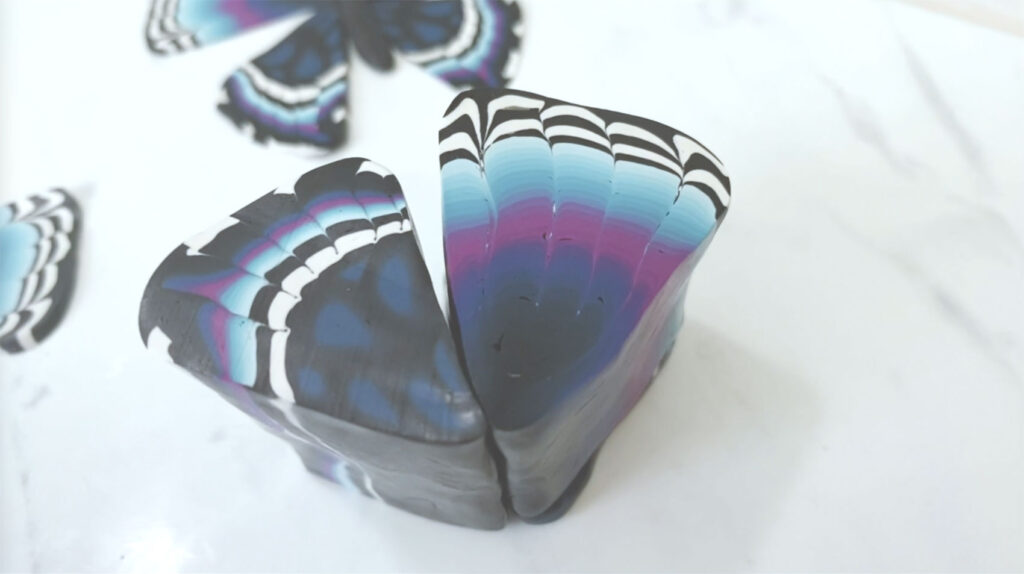
Butterfly cane top wing and bottom wing.
Butterfly canes top wing and bottom wing.

Make gorgeously detailed butterfly canes using a neat trick with a simple old credit/gift card. This tutorial involves some basic knowledge of skinner blending, click here for a walkthrough for how to do that. After making these butterfly canes, you will be rewarded by seeing just how much magic you can work with your hands to turn your colors of clay into life. First, we are going to start with the top wing and then do the bottom wing. So let’s get started!

Colors for butterfly polymer clay cane tutorial.

For the butterfly clay cane tutorial you will need:

  • 3oz of black (84g) Black
  • 1.5oz of white (42g) White
  • .75oz of light blue (21g) Teal
  • .75oz of med blue (21g) Purple
  • 1.5oz of dark blue (42g) Dark Blue

Create Top Wing of Polymer Clay Butterfly Cane

Step #1: Create Black and White Striped Cane

To start off, condition 14 grams of black clay and 9.33 grams of white clay. Then roll each color on the thickest setting of your pasta machine (for me, it’s 0) to make rectangular sheets. Stack the white sheet on top of the longer black sheet. Trim off the hanging black clay. Cut it in half and stack them on top of one another to create a black and white striped cane.

Trimming off extra black polymer clay.
Cutting clay in half.
Stacking the two pieces on top of one another to create black and white striped cane.

Next, take the remaining black clay you trimmed off earlier, and run it through the pasta machine’s thin setting number 5. Attach this thin black sheet to the white side of your striped cane.

Step #2: Create Polymer Clay Gradient Cane

For step 2, condition 7g black clay, 11.2g of each of the dark blue, purple and teal clays and 5.6g of white clay. Feel free to switch out these colors with your own configurations. After that, create a skinner blend arrangement as depicted below. Making sure the pieces are held tight together, run through the thickest setting of the pasta machine to also help the piece adhere to one another. Then fold the sheet and run through your pasta machine – repeat this several times until well-blended.

Skinner blend arrangement with black, navy, purple, teal and white clay.
Run clay through pasta machine’s thickest setting.
Fold in half and run clay sheet through pasta machine multiple times until well blended.

Next, fold the sheet in half for vertical stretching. Run it through the pasta machine lowering the thickness setting a couple times until you get it thin, on my machine, it’s the 5th setting.

Folding clay sheet in half vertically.
Running vertical sheet through.
Adjust to thinner settings and run through again to elongate the sheet.

After you get a very long and thin gradient sheet, make a gradient cane. Start on the light end and 1 inch folds and keep folding like an accordion. If you have trouble with air bubbles, instead of folding you can slice inch rectangles and continuously stack to get a similar effect.

Making 1-inch accordion folds to create a gradient-like effect out of polymer clay. Instead of folding you can also try slicing rectangular sheets and stacking to minimize air bubbles.

Step #3: Create Texture with Polymer Clay Caning Hack Using a Card

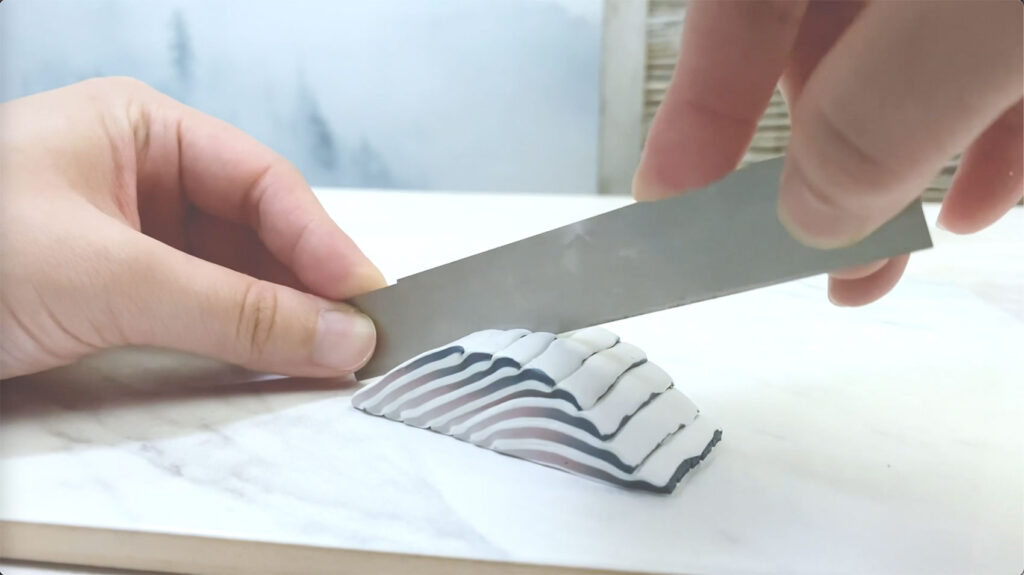
For step 3, stretch and pull the striped cane so that it’s more similar in size to the gradient loaf. This is to make the proportions more similar for the next step. After that, place the striped cane on top of the gradient cane. Now we’re going to use a neat little card trick, are you ready?

Polymer clay caning technique using a simple old gift card. You can use a ruler or whatever else you have in your house that’s similar in shape.

Next, take a thick old store credit card or rewards card and slowly press downward. It’s okay if the clay resists or gets a bit distorted, that’s what you want to happen. Try to go as far as you can, without cutting all the way through. But if you cut all the way through, you can still reattach the pieces together. After that, pinch the gradient end so that you get more of a triangle. A thicker card may give you a nicer more exaggerated effect.

Pinching butterfly wing to get the end pointy.

Now you have completed your top wing, and it should look something look this.

Create Bottom Wing of Butterfly Clay Cane

Step #1: Create Gradient Clay Cane

For step 1 of the bottom wing, condition 7g each white, black, teal, purple and dark blue clay. Create a skinner blend arrangement, and run through your pasta machine until well-blended.

Imperfect skinner blend configuration.
Run through thick setting to adhere the pieces.
Fold in half that run through the pasta machine. Repeat multiple times until well blended.
Butterfly gradient sheet using dreamy cyan, purple, blue and black colors.

After creating the gradient sheet, fold the sheet in half. Run it through the pasta machine lowering the thickness setting a couple times until you get to a thin setting like number 5.

Folding the gradient sheet in half hot dog style.
Running vertical sheet through pasta machine.
Repeating running vertical sheet through pasta machine to get it thinner.

After making a long skinny gradient sheet, make a gradient loaf with 1 inch accordion folds. After that, take an acrylic roller to flatten the loaf to about half a centimeter thick.

Step #2: Add Black and White Polymer Clay Layers

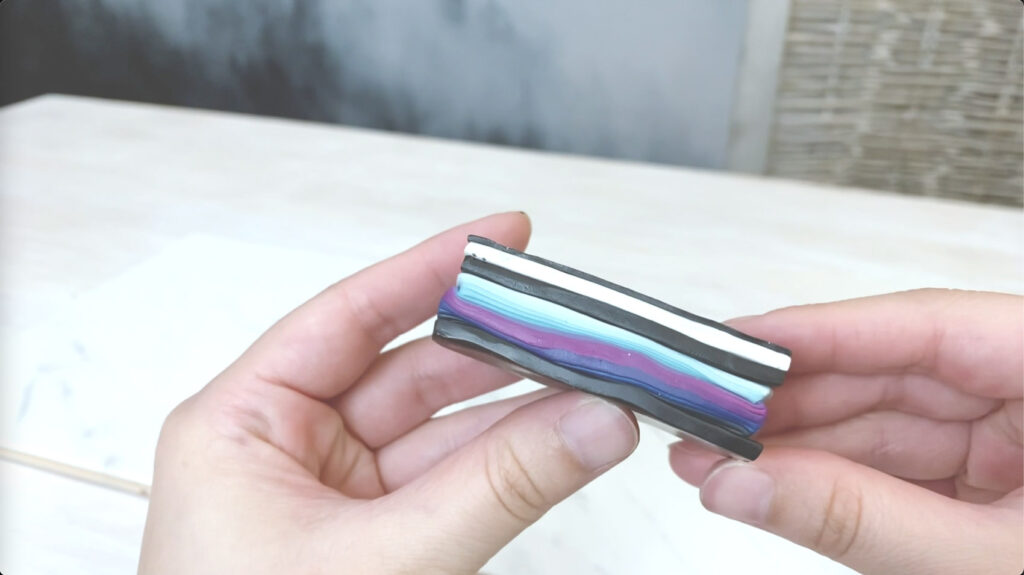
For step 2, condition 28g of black and 14g of white clay. Run both of them through the pasta machine using a thick level, like setting 0 of your pasta machine. Sandwich the gradient loaf with black clay. After that, add a white layer to the bottom. Then run the remainder of the black clay into the pasta machine using a thin setting like setting 5 and add this to the white layer.

Added black clay to the top and bottom of the gradient cane.
Adding white clay to the butterfly cane.
Adding thin black layer to the butterfly cane.

Now your polymer clay butterfly cane should have something that looks like this.

Step #3: Create Butterfly Speckled Pattern Using Strips of Black and White Clay

Next, place the cane onto the tile or surface, with the thin black layer side facing down against the table top. After that, run a sheet of white and black clay through setting 0 of the pasta machine. From both the white and black clay, cut out strips in various widths.

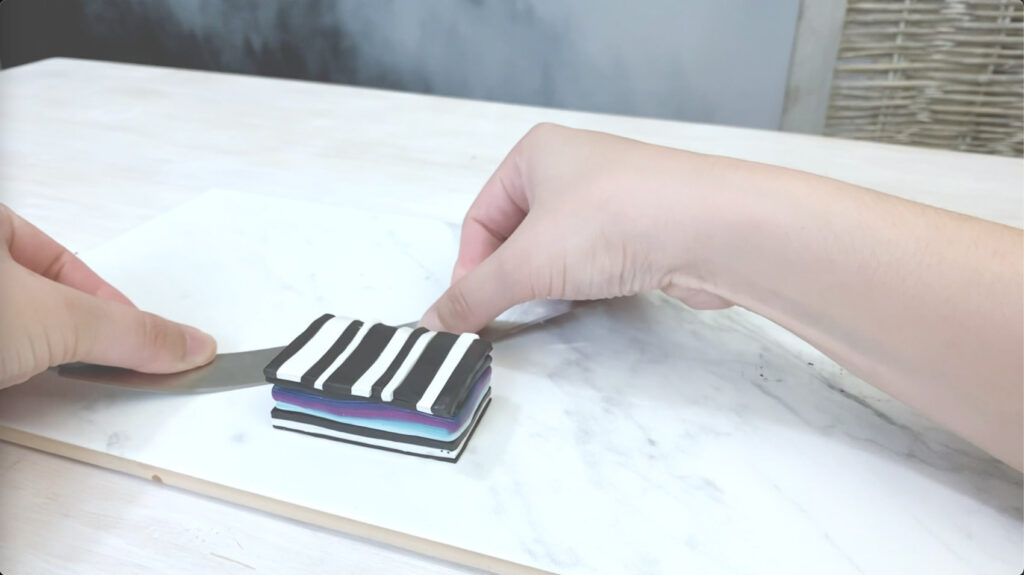
After cutting out randomly sized white and black strips, create the look of a random pattern of white specs to the wings. To do this, place white and black strips on top of the gradient cane in your desired arrangement. Trim off the excess clay.

Cutting various sized white strips and placing them randomly on the cane.
Cutting various sized black strips and placing them randomly on the cane.
Clay butterfly slab with black and white speckled pattern.

Step #4: Create Clay Texture with Card

For step 4, divide your loaf into 6 or 7 sections. They can be even or vary in width. You can make light marks on your loaf before doing this. Then with an old card. Slowly press down into the clay. Again, try to go as far as you can, without cutting all the way through. 

Create texture in polymer clay using an old gift card.

Step #5: Create Bullseye Canes and Make Cool Butterfly Wing Texture

Next, let’s work on filling in the rest of the bottom wing. You should now have about 21g of each of your two darkest colors.

Start by making a gradient with your darker colors that’s offset about an inch. Run it through your pasta machine until well-blended. Fold the sheet in half. And continuously run it through the pasta machine decreasing the thickness until you’re at setting 5 or 6.

Making a skinner blend with 1inch offset from the edges.
Black to blue skinner blend gradient.
Fold skinner blend in half to make it skinnier.
Process skinny gradient sheet through pasta machine.
Elongate the skinner sheet by choosing thin settings.
Create bullseye cane by rolling from one end.

Next, start rolling from the lightest to darkest end to create a bulls eye cane. The center may start to ooze out, but that’s okay. Just push those fellers right back in after you finish rolling.

Polymer clay caning technique: bullseye cane

After create a bullseye cane, reduce the cane and make 2 large pieces, 2 medium pieces and 3 smaller pieces. There’s no exact measurement for this.

Reducing the bullseye cane to make multiple various sized pieces.

Then pinch your 2 largest canes to make a teardrop shape.

Pinching bullseye into a teardrop shape.

After that, assemble the canes together into a bundle in no particular order, but have the teardrops point in the direction where you will make the point of a triangle. Compress and fuse the pieces together. Pinch in the direction of the teardrop shapes to create a triangular cane.

Assembling bullseye teardrops into a bundle.
Finished butterfly wing bullseye texture bundle.
Fusing pieces of bullseye canes together.

Next take the gradient cane and push into it to make it curve slightly. And fit the two pieces together. Compress and reduce the cane to fuse the components together.

Make a curve in the gradient cane.
Fit the gradient cane and the bullseye cane together like a puzzle.
Butterfly cane cut into slices and assembled.

Now you have another complete detailed butterfly wing! After that, you have the option of slicing each of your wings in half to assemble into a full butterfly cane. But keeping them separate like this may give you more options for variations and makes it easier to reduce to other sizes.

I hope y’all enjoyed this tutorial and have lots of fun making your own cool butterfly wing patterns. Happy caning!

Here’s a video version of this tutorial to supplement your reading.

Subscribe to my Youtube Channel for daily videos here.

Did you find this helpful? Get notified of new content releases:

Sign up for News or Notifications

Playlist on Polymer Clay Beginner Tutorials

Playlist on Polymer Clay Cane Tutorials

Filed Under: Polymer Clay Canning Tutorials

Easy Peasy Beautiful Feather Canes

March 24, 2023 by jennifoo

A beginner polymer clay tutorial for making easy, but gorgeous feather canes in step by step walkthrough. You’ll be surprised relatively simple the steps are!

Step 1:

How to Create Simple Gradient Blend

Start off by creating a navy, pink and white gradient blend. Each of the 3 colors weigh about 12 grams, but I would recommend using a little more like 16 grams if you want thicker leaf sections.

I roughly cut out triangles for the skinner blend and piece them together. This shows that you don’t have to measure out perfect triangles to create a skinner blend. Then I run it through the pasta machine multiple times until it is well-blended.

Feather cane tutorial colors.
Skinner blend configuration.
Folding gradient in half and processing through pasta machine several times.
Gorgeous gradient blend processed through pasta machine.

Step 2:

Convert Clay Gradient Sheet to Roll

Next, you want to convert your gradient sheet into a roll. You want to start at the end where you have all colors rather than a side where there is just one color. Roll tightly to avoid gaps of air, but being careful not to squish the clay.

Step 3:

Transform Gradient Roll to Plug Shape

After you’ve turned it into a roll, the next step would be to transform this into a plug shape. Use a combination of compressing the ends inward, rolling it across the table and continuously compressing. You want to get it around 1.5 inches with a diameter just under an inch.

Step 4:

Transform to Gradient Rectangle Cane

Next, we you want to turn this plug shape into a rectangle. Set your plug on flat surface, get a roller, and roll over each side. Then using your fingers to refine the rectangle shape. After that, you should get something that looks like this.

The reason why we turned the gradient into a plug, then a rectangle, is so that we would be able to stretch the rectangle vertically to get a tall gradient sheet as opposed to a wide one.

Start the reduction process using a series of pinching motions across the entire surface of the rectangle cane. I also like to press it down onto a flat surface to help keep the sides flat. And pushing down any bumps that occur. 

After you get to about 1.5 inch in width, you may use a roller to help flatten it a bit more until the clay sheet is about 1/4 of an inch deep. Next, run it through the largest setting of your pasta machine. You can reduce the thickness if you want the sections of the feather to be thinner. 

Step 5:

Create Feather Cane Components

Next, grab a sheet of white or black clay and run it through the 6th setting of your pasta machine to get a long sheet of clay. This will be the barbs of your feather. Being careful to avoid air bubbles. Set your gradient blend on top of the thin sheet and cut off the excess clay from the sides. 

Polymer clay gradient sheet being placed on thin sheet of white clay.
Clay gradient sandwiched in thin white clay.
Divide new clay component into 8 equal pieces.

Then you want to grab the main body and place it over another thin white sheet so that the top and bottom of the gradient blend is covered with white clay. Cut off any imperfections from the sides. I use an xacto knife to pop any air bubbles and my fingers to smoothen the texture.

Next, divide your clay into 8 equal sections. Miraculously, my sheet ended up being 8 inches in length which made it easy to mark and slice my cane components. You clay component should look something like this.

Step 6:

Compile Feather Cane Components into Staircase

Set it down on a flat surface. And create a staircase by offsetting the next piece about 1/4 of an inch from the previous piece. And you want to keep doing this for all 8 pieces. 

Next, you want to turn this into a semicircle. Push the staircase downward and compress the sides. I use a combination of pinching across the entire surface of the cane, compressing against a flat surface, and then repeatedly pinch to blend the edges.

Step 7:

Assemble Feather Cane Components

Now you should have one half of your feather cane. Slice the cane in half so you get two pieces of a circle. But before you connect the two pieces together, you want to add the vein of the leaf. Choose a color for the vein, roll it through the 6th largest setting of your pasta machine, and insert it 2/3rds of the way from the end, then connect the 2 halves together and cut off the excess clay.

Multiple rectangular canes stacked on top of one another.

Do some finishing touches with your fingertips to sharpen the point at the top of the feather and to smooth the sides.

Step 8:

Feather Cane Reduction

In order to reduce the feather cane, set it on a flat surface. Take both hands at the opposite ends and compress towards the center and upwards. Apply pressing motions to the bottom of the feather to round it a bit. I also like to add some scrap cray to the ends to reduce the amount of distortion i’ll have to cut off later.

After you’ve reduced it to your desired size, cut off the scrap clay and make your cane slices.

Now you have your completed feather cane. I hope y’all enjoyed this caning tutorial. Please subscribe to my Youtube channel if this was helpful, and good-luck with your next polymer clay project!

Here’s a video version of this tutorial if you would like the supplementation. Don’t forget to have fun!

Subscribe to my Youtube Channel for daily videos here.

Did you find this helpful? Get notified of new content releases:

Sign up for News or Notifications

Playlist on Polymer Clay Beginner Tutorials

Playlist on Polymer Clay Cane Tutorials

Filed Under: Polymer Clay Canning Tutorials

Fireball Explosion Canes | Easy Cane Tutorial

March 24, 2023 by jennifoo

An eye-popping retro funk cane tutorial with explosive fireballs, thunderbolts shooting from the center, and electrical flame shapes. I mean why not? If you are new to caning this is a great tutorial for you to get hands on and invoke your sense of imagination and spark your creativity.

You’ll learn 3 different styles of retro funk canes in this tutorial.

While these may look complex, they are actually great beginner canes that are fun to make and allow you to experiment in the process even if it gets messy, you’ll be able to create unique and interesting designs. The key is to not get too caught up in perfection. This cane tutorial will only require basic tools such as your hands, a roller, and a blade. So let’s get started.

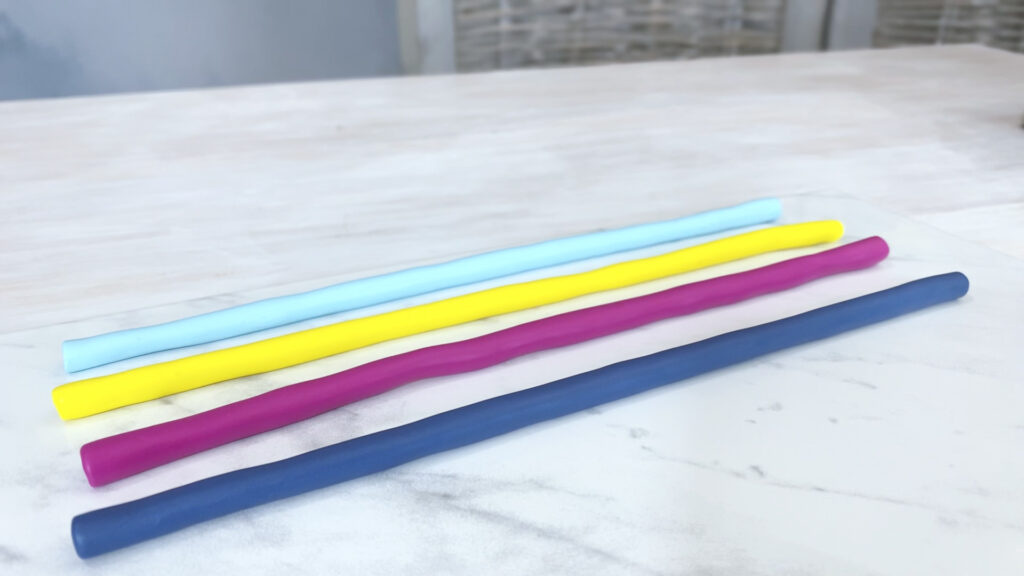
Here, i’m doing some retro funk themed colors starting from lightest to dark, I custom mixed a sky blue, a medium yellow,  this magenta was already premixed in the package, and midnight blue. The light blue and yellow has a lot of white which is softer than the others color, so I mixed in a dab of Sculpey III transparent to the midnight blue and magenta to hopefully make the consistency a bit more even throughout.

Step 1: Choose 4 Colors, Create & Mold Cane Snakes

Each of the 4 colors of clay, should be about 1/4th of a block, which is approximately .5 ounces. I started weighing clay so I can be sure I have an even amount of each color and not have to accumulate more scrap clay than I need to. And you want two of the colors to be high in contrast to one another. In this cane tutorial, i’ll be using Fimo polymer clay.


Roll each color into snakes that are 1/4th of an inch in diameter. Start from light to dark, to minimize color contamination. Don’t worry about keeping the snakes perfectly neat and uniform at this stage. Each snake should be about 9-inches or longer.

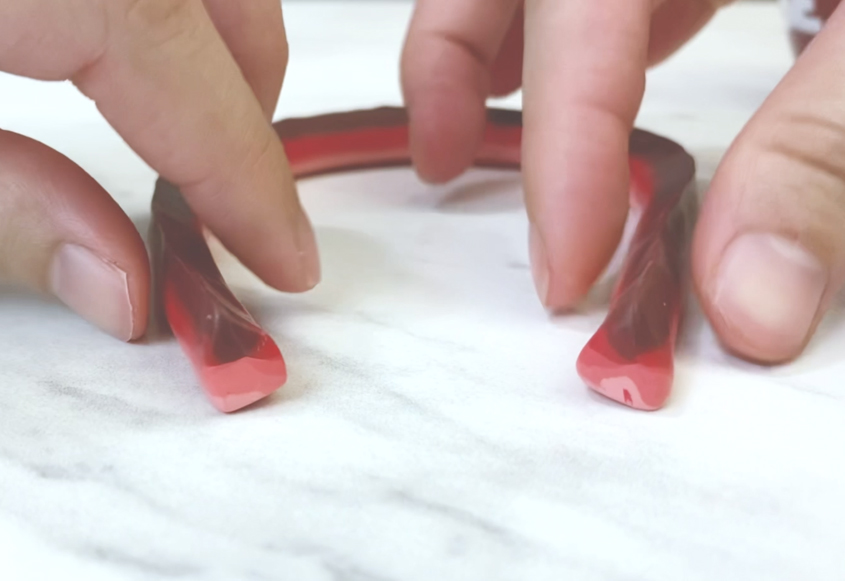
Next, pinch the clay snake between both thumbs and forefingers. This will form the diameter into a smooshed diamond shape. Do this along the entire length of each clay snake. I found the easiest way to go about this is to sort of hang it from a table while smooshing which helps give it some support and makes the process go more smoothly.

After that, cut each snake into about 1.25-inch lengths so that you get multiple pieces to assemble your cane.

Step 2: Assemble the Cane

To start off, you can choose a light colored clay. Before starting, you can redefine the diamond shape a bit, it’ll make the next steps easier. Do this for all the colors.

After that, build up a column of 4 pieces of the same colored clay by attaching each piece on top of one another. The next step is to fill in the front and back sides of the column of clay. You want to choose a contrasting color for this. Fill the 3 gaps on the front and the 3 at the back.

For the first column i’m using yellow colored clay, stacking 4 pieces on top of one another. Next, I add magenta to both sides of the first column.
While the clay is being handled, it’s common for v-shaped gaps to collapse a bit depending on how soft your clay is. If that happens, you can reopen the gaps with your fingers or clay tools.
Here, i’m following up with 4 pieces of sky blue color on either sides, and then 3 pieces of dark blue on either sides.

After you filled in the sides of the center column with 3 colors, continue to fill in the gaps with the remaining colors altering between using 4 and 3 pieces. You can experiment a bit if you’d like.

Also note that it’s okay if you see some distortion, because it can enhance the patterning of the cane. However, it is important to fill in gaps completely when adding components so that they either interlock or overlap, you just don’t want to leave trapped air between layers of clay.

Step 3: Compression & Reduction

Compress the block into a rectangular shape.

Compressing retro funk cane.
Add scrap clay to the end of the clay cane.
I created two copies of the level 1 base cane. I’m going to take one piece for SEC 4 (fireball cane & electric wave cane) and the other piece for SEC 5 (mirror cane).

Next, add blocks of scrap clay to the ends. This is a neat little trick that will minimize the amount of distortion you will have to cut off at the ends after cane reduction.

Apply further compression and reduction techniques to reduce the cane to 7 inches in length.

You don’t have to do this, but at this stage I’ve made 2 copies of this cane in order to show you how to make different variations from this point, one will be used for 2 variations of kaleidoscope designs in SEC 4, and the other will be used for 1 mirror cane design in SEC 5.

SEC 4A:

Kaleidoscope Canes

Kaleidoscope Canes are made up of 6 equilateral triangles or 3 diamonds.

Take the level 1 base cane from the previous section (step 3) and trim off the distorted ends. Cut the cane into 4 equal sections and stack one over the other. You do not need to match the patterns. In fact, the less perfect the assembly, the more interesting the finished pattern will be. Then compress the cane into a square (use a mixture of compressing the back and front faces of the cane) and pinching across the length of the canes or pushing the sides against a clay-safe flat surface. After it is a square, reduce it to 7-inches long again.

Trimmed off distortion from cane.
Divided cane into 4 pieces and stacked.
Compressing clay cane.
After reducing it to 14 inches, I now have a level 2 base to create two different kinds of sub canes.

Next, i’m about to demonstrate 2 alternative kaleidoscope designs using the square loaf i’ve just created as starting point. So you should have reduced it to 7-inches for your cane. But i’ve reduced it smaller to 14 inches so that I can cut in half and show you 2 different variations. You don’t have to do this, if you only want to go with 1 design of your choice.

SEC 4B:

Kaleidoscope Cane Design: Fireball Cane

In this section we are going to use one piece of the level 2 base cane from SEC 4A to create this kaleiodoscope clay cane that looks like an explosion.

For the first variation: Take the square loaf from the starting point from SEC 4A, and pinch the cane into a triangle shape. Depending on where you pinch it, will affect the look. For this variation, i’m pinching starting from the solid blue end. I found it easier, to set it on a table and do the pinching across the entire length of the cane.

After that, cut the cane into 3 equal lengths and assemble the pieces into a fanlike semicircle. Then, cut that cane in half. Take the two halves and piece them together to form a completed hexagon or circle shape. Now you have your completed kaleidoscope cane design which to me, sort of looks like a blazing tumbleweed, but yours may look completely different and that’s okay. That’s the beauty of this technique is that it’ll create some unique designs and patterns depending on who makes it.

SEC 4C:

Kaleidoscope Cane Design: Electric Wave Cane

In this section we are going to use the last piece of the level 2 base cane from SEC 4A to create this kaleiodoscope clay cane that looks like it’s emitting electric waves.

Take the leftover copy created in SEC 4A (where we cut the 14inch cane into 2 copies). And instead of pinching from the solid blue end, i’m pinching from the side with yellow. Go through the same process as previously.

Here i’m pinching from the yellow end.
After pinching, I divide it into 3 equal pieces and then re-assemble.

After pinching, cut the cane into 3 equal lengths, assemble the pieces into a semicircle. Cut the cane in half, then piece them together again. Now you have your completed kaleidoscope cane design variation, this one sort of looks like lightning bolts shooting from the center. It’s cool how simply pinching from a different starting point, can give you new designs to play with.

SEC 5:

Electrical Flames Mirror Canes

Mirror canes, are made up of 4 mirrored sections that mirror along 4 sides. In this section we’ll be creating a mirror cane, and using the slices to assemble a mirror pattern.

To make a mirror cane, i’m grabbing the last copy of cane base level 1 created all the way back in STEP 3 (as a recap I created two copies of the level 1 base, then took one of the copies to create two other level 2 bases that formed the fireball and electric wave canes).

Cut off the distorted ends, then cut it into 4 equal lengths, stack them on top of one another. Then compress the cane into a square. After it is a square, reduce it to 7-inches long again. Then pinch parallel to the core center column across the length of the cane to turn it into a triangular shape.

I took the level one base, divided it into 4 pieces and stacked.
In the process of reducing cane to 7 inches long.
After reducing pinch along the yellow end.


If these steps sounds familiar, that’s because the mirror canes do share the initial same steps followed by the kaleidoscope canes, but here’s where we’ll do things a little differently. Instead of cutting into 3 pieces, cut it into 2 pieces, then mirror the 2 halves so that it now has a diamond shape.

Next, compress the points of the diamond inward to form a square shape. You can use a combination of techniques to create the square shape by pressing the cane against a clay safe table and or using a roller to roll across the sides of the square.

Here i’m compressing the points of the diamond inward.
After compressing and rolling the sides, you get a rectangle/square shape.

Now you have your mirror cane. In order create the mirror effect, cut out 4 slices, and arrange them, rotate or flip them, so that the pieces mirror each other and you can play around with making your own patterns as your desire.

Electrical flames mirror cane.

I hope y’all enjoyed this tutorial, i’m getting feedback that’ll y’all love making canes which i’m delighted to hear, and i’ll be producing more cane videos as well as other polymer clay tutorials in the near future.

To make sure you don’t miss these videos, I invite y’all to subscribe to my channel and hit the notification bell that pops up next to it, that way you get an alert when my next video is up.

Here’s a video version of this tutorial. Goodluck!

Subscribe to my Youtube Channel for daily videos here.

Did you find this helpful? Get notified of new content releases:

Sign up for News or Notifications

Playlist on Polymer Clay Beginner Tutorials

Playlist on Polymer Clay Cane Tutorials

Filed Under: Polymer Clay Canning Tutorials

7 Caning Tips You Need to Know Before Starting

June 3, 2022 by jennifoo

The essential guide and introduction to millefiori caning for beginners.

lotus flower cane

First, What is Millefiori Canning? Millefiori Canning is one of the most popular polymer clay techniques to learn. It’s based on an ancient Roman glass technique that creates a horizontal rod of multiple colored pieces arranged in a bundle to form a pattern or image when viewed at each end. One simple way to describe millefiori caning is to think of yourself as sculpting an image along a horizontal plane forming a cane. Each time you slice the cane, you get a copy of the image.

You may continue reading, but if you’re like me who prefers to listen and see, you can watch in video format:

Subscribe to my Youtube Channel for daily videos here.

Getting Started with Caning

If you’re new the caning, it’s best to start with simple canes and work your way up into more complex pieces. Canes can take countless hours on a complex design and shape, you want to make sure you already have a good idea of how your clay might behave once assembled together, sliced and when applying cane reduction techniques.

Starting simple also allows you to familiarize yourself with how your choice of clay brand might affect the caning process. For instance, firmer clay brands may be easier to cane with because they’re less sticky, but may have a shorter storage life. Knowing where you stand on the basics will allow you to be more efficient and save time as you progress in level of complexity with caning. Now, here are 8 of some of the most important caning tips you need to know before getting started!

7 Caning Tips For Polymer Clay Beginners

1. Choose a Workable Cane Length

As a rule of thumb, you want your canes to be a minimum of at least 1 inch in length. Shorter lengths can make assembling more detailed patterns difficult. Determining the length of your cane is mostly dependent on how many slices you desire our of your cane and how frequently you think you might use the pattern.

lotus flower polymerclay

2. Use Cane Reduction to Minimize Gaps of Air Trapped Between Layers of Clay

Throughout the caning process you will need to employ a technique called cane reduction, which consist various compression techniques with your fingers across the entire surface of your cane to reduce its size.
In my (polymer clay canes for beginners video) you learn that this helps eliminate air bubbles and gaps between layers of clay in your cane and allows you to create various different sizes out of a single cane

cane reduction

Another reason why cane reduction is important to learn, is that after storing canes for long periods of time, you may need to recondition your cane using cane reduction so you canes slices don’t crack when sliced.

3. Distortion Along Cane Ends After Cane Reduction is Normal

After reducing your cane, you might notice some distortion along the ends — this is normal, and usually requires a few cuts to reveal the undistorted clay. Though, the better you become at reduction through practice, the less distortion you will have to cut from the ends of your canes.

polymer clay distorted ends

A cool hack is to add scrap clay at the ends to get the most use of your cane design, just use 2 layers or more of scrap clay from the thickest setting of your pasta machine to add to the ends prior to resting your cane so that it firms up with the rest of the cane. Then after the reduction process, you can slice off the scrap clay.

scrap clay usage
triangular cane with gradient

4. Aim For Even Firmness Before Reduction

It’s important to have consistent clay firmness throughout all areas of your cane before applying reduction techniques. This is because if one area is stiff and other parts are soft, the stiff parts won’t budge while the softer parts will move, causing distortion and uneven reduction.

As a beginner, one easy way to control some this is to stick with the same brand of clay throughout your cane since there are many differences among clay brands in terms of firmness and elasticity. If mixing brands cannot be avoided, it’s best to use equal ratios of brands for each color.

However, regardless of the brand you use, there may be some variation in firmness between colors as well. So if you find one color is stiffer than the rest, you can soften it by mixing it with softer clays when color mixing, or if you are going for a pure color, you can mix in soft translucents instead.

The last tip for maintaining consistency, is for canes that take a long period of time to create. Canes that take several hours or even a course of several days will have an uneven consistency because the areas you work on first will be stiffer than the areas you worked on last.

To resolve this, after you create your cane, you want to let it rest for a few hours or even days depending on how long it took to make the cane before you reduce it. This will allow the rest of the clay to catch up and have the same level of stiffness throughout.

5. Wait Before Cane Slicing

When slicing canes, it can be quite the challenge to get a clean, crisp cut without pinching the clay with the pressure of your blade. This is because most clays will be too soft to slice immediately after being created. That’s why it’s also important to let you cane rest for a few hours before your slice it. 

Untouched clay will regain firmness. If you don’t want to wait that long, you can freeze your cane for 10 to 15 minutes before slicing. Clay thaws quickly, so you may have to re-freeze for larger canes.

6. Canes Stiffen Over Time (choose the right brand for long-term storage)

Canes will stiffen over time so it’s important to choose the right clay brand for the project, or be aware of how soon your cane needs to be used up before it gets too stiff.

On one hand, firmer clays are easier to cane with and produce better detail, on other hand, those canes may have a shorter storage period than those made from less firm clay brands. This is because firmer clay brands are stiffer after long periods of rest and may be harder to recondition. If you try to slice a cane after it’s stiffened, the slice may fracture if you try to condition it, especially if it’s cut thin. However, this shouldn’t be a problem for thicker slices for buttons or beads. Though in that case, you want to drill holes after it’s baked.

So if you plan to use your canes way into the future, keep in mind that you may have to reduce the size of the cane in order to recondition it. If reducing the cane size isn’t desired, you may consider constructing canes from clay brands that have a longer storage life. The brand Kato, which is considered one of the best firm clay brands for caning, also has a good shelf life (it takes a year or so before it starts getting hard). For a soft alternative, you may also want to consider Fimo soft which has the least amount of blade resistance when slicing and Sculpey Premo which is on the softer-end, but can retain detail in caning.

7. Storing Cane in Clay-Safe Containers

Storing canes is fairly easy. They do not need to be wrapped, but they should be stored in plastic containers compatible with uncured polymer clay to protect them from dust and lint and kept away from heat and light when not in use. Read more about storing canes safely through my safety guide: 10 Polymer Clay Safety Tips You Need To Know Now

8. Make Sketches For Complex Caning

When creating a complex cane, it may be helpful to sketch the pattern on paper first. Then you can enlarge or reduce that pattern on a photocopier or scanner as desired and place it under clear, tempered glass to use as a guide when creating and assembling the components.

Uses of Millefiori Canning

Lastly, let’s talk about the uses for millefiori caning. When cutting thicker slices from millefiori canes you can pierce the center or sides to turn them into buttons or beads.

polymer clay basket weave veneer

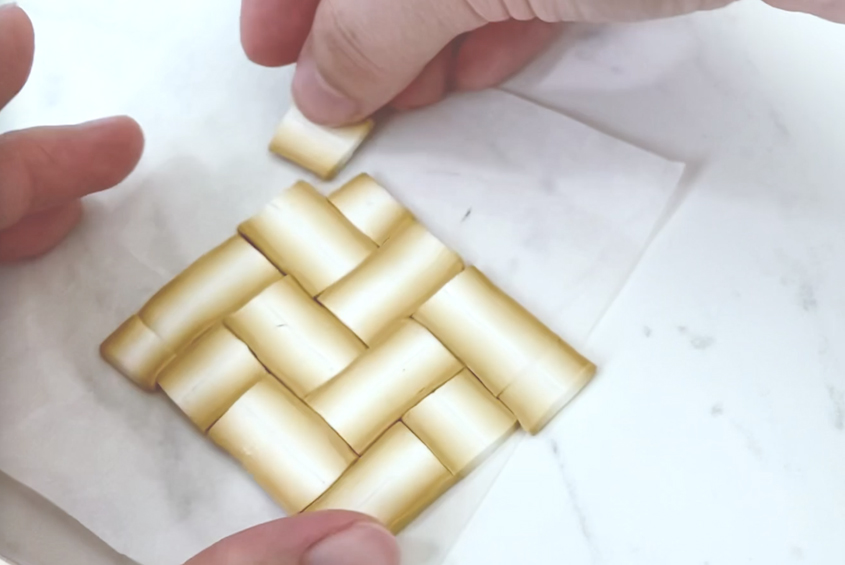
You can cut thinner slices and place them over base layers of clay to create veneers for decorating various surfaces (for example here is a veneer I created out of rectangular cane slices I arranged together to create a basket-weave pattern in my polymer clay canes for beginners video).

polymer clay veneer

Did you find this helpful? Get notified of new content releases:

Sign up for News or Notifications

Playlist on Polymer Clay Beginner Tutorials

Playlist on Polymer Clay Cane Tutorials

Filed Under: Uncategorized

How to Enlarge & Connect Polymer Clay Designs

June 3, 2022 by jennifoo

Enlarging sheets of polymer clay is useful if you made a pattern, design or gradient with a set amount of clay, that ended up smaller than what you needed, but don’t want to redo everything from scratch.

Connect multiple sheets of polymer clay is a polymer clay technique that allows you to create large-scale patterns that you can’t produce by normal means. For instance, your pasta machine may have a set width that limits how large or a sheet you can produce. By assembling multiple sheets together you can create large backgrounds or designs for your projects.

Subscribe to my Youtube Channel for daily videos here.

Enlarging Sheets with White Clay

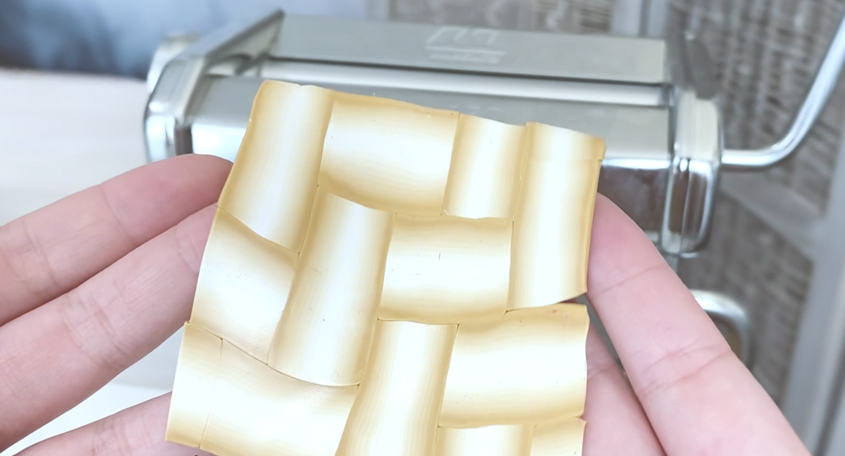
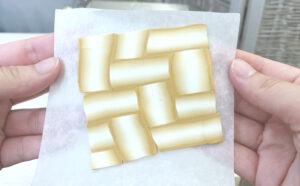
Here this basket-weave design was made out of rectangular canes in my previous tutorial (called Polymer Clay Canes for Beginners).

holds up basket weave design

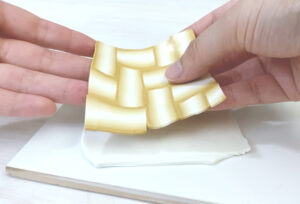
To enlarge this sheet which is also called a veneer is pretty simple, take some white clay, condition it and run it through the largest setting of your pasta machine to make a base layer.

place veneer on sheet of white clay

Next place your veneer onto the white base and trim off the excess clay.

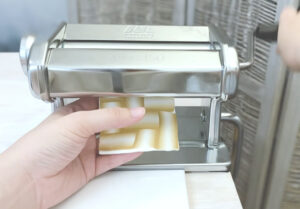
Then run this through your machine again at the largest setting and gradually reduce the thickness setting until the sheet is at the desired thickness.

run veneer through pasta machine

Keep in mind that this method stretches the veneer and thins it. So the veneer on top will blend a bit into the white base layer underneath. Which will slightly mute the colors, which is why white clay is recommended as the base layer for this technique. You can also experiment with different colors, for this, even light brown clay would be acceptable.

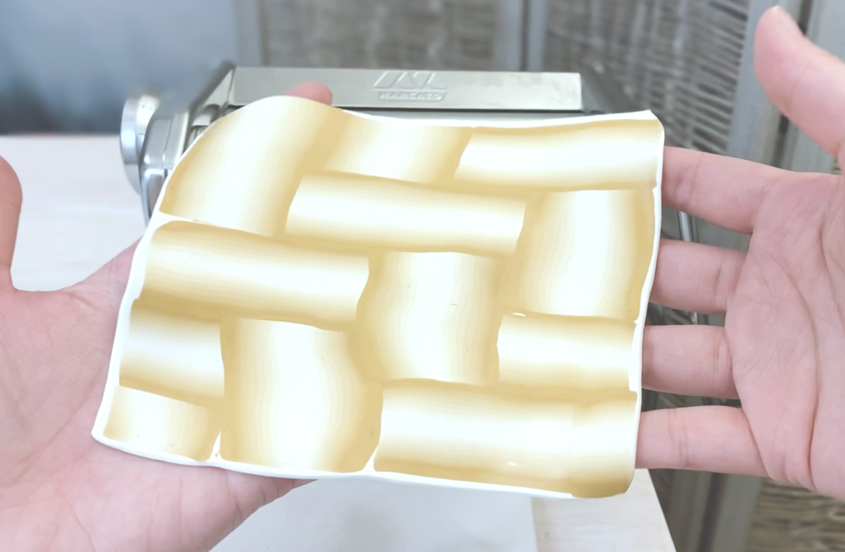
enlarged veneer being held up

Now you have an enlarged sheet of polymer clay that you can use as a veneer to decorate any number of surfaces.

Connecting Polymer Clay Sheets

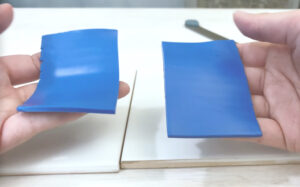
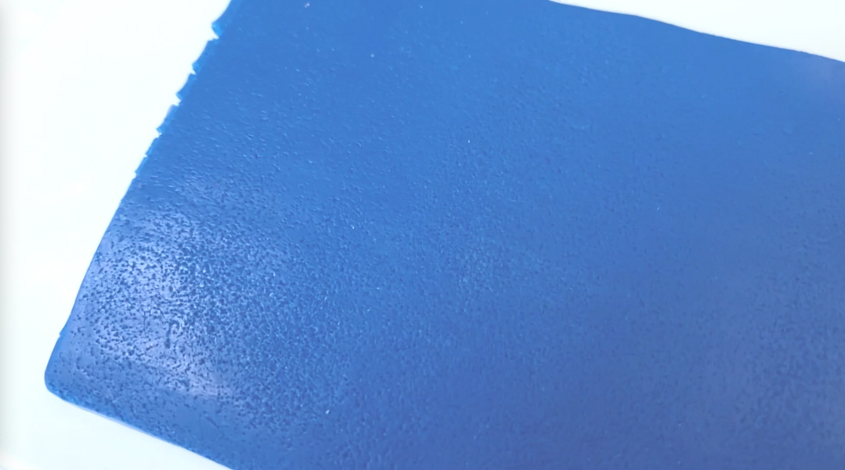
holding up 2 pieces of blue clay

This next technique i’m going to demonstrate is going to allow you to create large polymer clay sheets by connecting multiple pieces together.

Take the two pieces of surface sheets you would like to combine together. Here i’m using some thick sheets of blue Kato clay as an example, to show that it works on firm clay as well.

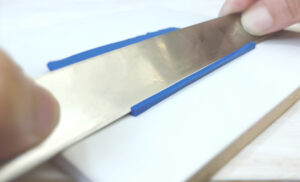
Identify the ends that you will join together. And approximately 1/16 of an inch from the edge, slice down at a 45 degree angle, it doesn’t have to be super precise, but just make sure whatever angle you create is mimicked on the other half as best you can.

slicing blue clay at an angle

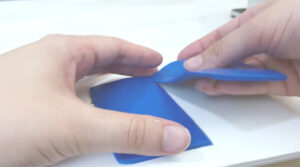
Then take the other half flip it vertically and do the same thing. And once, you flip it back over the two halves should connect together like a puzzle.

connect two pieces of blue clay together

Join the two pieces together, then get some parchment paper, to cover the seam, and burnish it to smooth it out. This method works great not only for large sheets, but smaller applications as well.

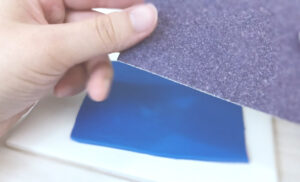
coarse sandpaper

You can keep adding more sheets as you desire with this method until it reaches the size you want.

blue clay textured with coarse sand paper

After you are done, consider adding texture to your backgrounds using coarse sand-paper or rubber stamps.

Here I am using my basket weave veneer from earlier as an example. I added some scrap clay to the bottom layer so that it wouldn’t be too thin.

Filed Under: Beginner Polymer Clay Tutorials

Boho Gifts Guide For the Quirky Free Spirit (Gifts For Her)

April 29, 2022 by jennifoo

The bohemian gal is a free spirit. Boho gifts should reflective of her radiance and inspire positive energy.

This specially curated boho gifts guide contains over 15+ ideas for your gal. Every boho gifts item in this guide have links to purchase which make it convenient and hassle-free to purchase the item that you want. If you find something nice, feel free to treat yourself with a gift as well! If not, hopefully you will walk away inspired with more boho chic ideas about what to get her!

images of various boho gifts ideas for her
Boho-chic Gift Ideas (if you see something you like, scroll below and click the item you want to order)

Disclaimer: This post contains affiliate links, which means I may earn a commission if you choose to make a purchase through my link (with no extra cost to you). Thank you for your support.

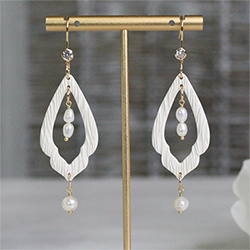
white clay earrings adorned with pearls

Elegant boho statement earrings that will make the boho gal feel gorgeous and lovely! These are high quality hand-made polymer clay earrings are the perfect gift to stun her and be on par with her radiance!

Shop JennifooClay Earrings

The bohemian patterns feature bright colors and natural forms that capture the essence of the boho chic gal.

Our first boho gift featured below is a flowy floral embroidered mini dress that comes in 18 different colors. Next up is a pair of wedge sandals with back zip-up closure which makes it a breeze to put on. Last on this row are gorgeously patterned waterproof laptop backpack and a water-resistant canvas messenger sleeve.

1

2

3

4

What boho gal doesn’t love a set of super cute boho candle gifts decorated with colorful and lively patterns?

This boho gifts candle set contains soy candles in the scents, Spring, lavender, lemon and mediterranean fig. Its healing scent delivers a consistent fragrance from start to finish. These boho candles are also great for insomnia, meditation, aromatherapy, energy cleansing.

Other boho gifts options include a pretty flower pen or brush holder. She’ll love the vegan and cruety free, Truly Unicorn Fruit Moisturizing Cream. It’s infused with matcha, acaii, chia, rose and collagen and brings a youthful appearance to the skin. Another boho gifts option includes a hanging photo display (macrame wall hang) where she can display memories from her boho adventures.

5

6

7

8

Bohemian gals want a gift that will make them feel uplifted, bright and positive so they have a better impact to the world and those around them.

Next up is Lindsey Stirling’s Citrine Eyeshadow Palette. Each color is infused with Citrine crystal. When applying this on, the Citrine crystal will facilitate positive energy, creativity, and intuition. Also, check out the star and moon dream catcher. It is a decorative pendant that will help the boho gal retain good dreams and keep the bad ones out. Other cool boho gifts to consider are macramé plant hangers to keep greens hanging around. Lastly, a comfy boho cushion is perfect for any boho gal to meditate on or furnish her house for her gust to sit on.

9

10

11

12

For some boho jewelry ideas go for something flowy and invokes that free-spirit nature of the bohemian gal.

Featured below are dangle earrings by Allison Rose with a filigree pattern inlay which are nice lightweight statement earrings. It’s made of durable material and are lead/nickel-free. It’s perfect for birthdays, weddings, bridesmaid, or an anniversary and includes a linen gift bag. Next up are fashionable, multi-layer boho style bracelet and a blue boho ring dish to display and hold pieces of jewelry you bought her. Another boho style gift idea is the “Live” perfume by Jennifer Lopez with a long-lasting scent that carries throughout the day. Its top notes are sicilian lemon, bargamont and pineapple. The sweet and warm base are sandalwood, tonka bean and caramel And ends with a middle note of peony and violet.

13

14

15

16

Nothing says boho style more than the intricately harmonious and flowy woven macrame texture.

First featured macrame boho gifts in this row is the 8 piece mini macrame key chain set which allows her to carry her boho vibes with her on the go. Next, is a macrame jewelry box organizer which would make a beautiful addition to any room. Then we have a boho style throw blanket, it’s hypoallergenic being made of 100% cotton. It comes in a beautiful natural cream color with circular mandala-like flower patterns with fringe scalloped edges. Perfect for her to decorate her couch, chair, ladder, or as a companion for travel, camping, picnics, and beaches. Add on a high-quality durable boho macrame hammock that fits 2 people and she’s good to go!

17

18

19

20

Check Out Other Gifts For Her (Gift Guides)

I hope y’all enjoyed looking through this boho gift guide and leave with a better idea of what to get her or maybe what to not get her. Check out these other gift guides for a vintage lover in your life, or your cute/class/chic gal-friend/girlfriend.

images of various vintage gifts ideas for her
Find vintage inspired gift ideas for the vintage lover to embrace. She appreciates attention to detail and things with a fine elegant touch.
View Vintage Gifts Guide
images of various chic gifts ideas for her
She embodies the three C’s: cute, classy and chic. Chic gifts should keep up with her lovable and sweet personality.
View Chic Gifts Guide

Filed Under: Gift Guides

  • 1
  • 2
  • 3
  • …
  • 5
  • Next Page »

Quick Links

  • Recommended Polymer Clay Tools & Supplies

Polymer Clay Tutorials

Polymer Clay Canning Tutorials

Beginner Polymer Clay Tutorials

DIY Crafts

white clay earrings adorned with pearls

Shop Gorgeous Handmade Earrings

Recent Posts

  • Dreamy Butterfly Canes & Amazing Clay Hack
  • Easy Peasy Beautiful Feather Canes
  • Fireball Explosion Canes | Easy Cane Tutorial
  • 7 Caning Tips You Need to Know Before Starting
  • How to Enlarge & Connect Polymer Clay Designs
  • Boho Gifts Guide For the Quirky Free Spirit (Gifts For Her)
  • How to Effectively Clean Your Pasta Machine
  • Cute, Classy & Chic Gifts Guide (Classy Gifts She’ll Love)
We use cookies on our website to give you the most relevant experience by remembering your preferences and repeat visits. By clicking “Accept All”, you consent to the use of ALL the cookies. However, you may visit "Cookie Settings" to provide a controlled consent.
Cookie SettingsAccept All
Manage consent

Privacy Overview

This website uses cookies to improve your experience while you navigate through the website. Out of these, the cookies that are categorized as necessary are stored on your browser as they are essential for the working of basic functionalities of the website. We also use third-party cookies that help us analyze and understand how you use this website. These cookies will be stored in your browser only with your consent. You also have the option to opt-out of these cookies. But opting out of some of these cookies may affect your browsing experience.
Necessary
Always Enabled
Necessary cookies are absolutely essential for the website to function properly. These cookies ensure basic functionalities and security features of the website, anonymously.
CookieDurationDescription
cookielawinfo-checkbox-analytics11 monthsThis cookie is set by GDPR Cookie Consent plugin. The cookie is used to store the user consent for the cookies in the category "Analytics".
cookielawinfo-checkbox-functional11 monthsThe cookie is set by GDPR cookie consent to record the user consent for the cookies in the category "Functional".
cookielawinfo-checkbox-necessary11 monthsThis cookie is set by GDPR Cookie Consent plugin. The cookies is used to store the user consent for the cookies in the category "Necessary".
cookielawinfo-checkbox-others11 monthsThis cookie is set by GDPR Cookie Consent plugin. The cookie is used to store the user consent for the cookies in the category "Other.
cookielawinfo-checkbox-performance11 monthsThis cookie is set by GDPR Cookie Consent plugin. The cookie is used to store the user consent for the cookies in the category "Performance".
viewed_cookie_policy11 monthsThe cookie is set by the GDPR Cookie Consent plugin and is used to store whether or not user has consented to the use of cookies. It does not store any personal data.
Functional
Functional cookies help to perform certain functionalities like sharing the content of the website on social media platforms, collect feedbacks, and other third-party features.
Performance
Performance cookies are used to understand and analyze the key performance indexes of the website which helps in delivering a better user experience for the visitors.
Analytics
Analytical cookies are used to understand how visitors interact with the website. These cookies help provide information on metrics the number of visitors, bounce rate, traffic source, etc.
Advertisement
Advertisement cookies are used to provide visitors with relevant ads and marketing campaigns. These cookies track visitors across websites and collect information to provide customized ads.
Others
Other uncategorized cookies are those that are being analyzed and have not been classified into a category as yet.
SAVE & ACCEPT

Get creative inspiration and updates from Jennifoo right to your inbox.