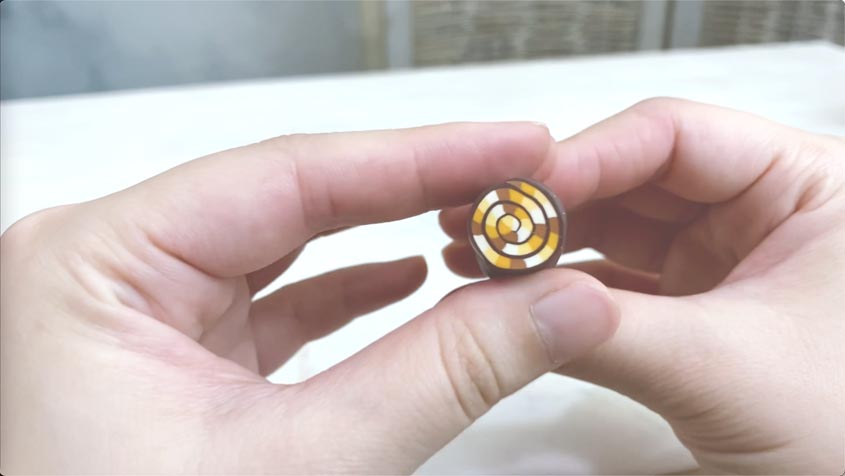
In this tutorial you will learn how to create some Striped Jelly Roll Canes. This is a great beginner cane design to learn as you hone your caning skills. And you can customize this by using various thicknesses of colors or by adjusting the height between the layers of clay.
You may continue reading, but if you’re like me who prefers to listen and see, you can watch in video format:
Step 1: Create Stripped Loaf

To start off, select two or more colors to make a striped loaf. Loaves are essentially square canes, and i’ll go over step by step how to make one.
You will need your colors for the pattern — i’m using these four colors here.
And then you’ll need a contrasting color for the outlines inside the cane — and i’ll be using this dark brown for that.
Then take each sheet and run it into your pasta machine at your desired thickness. Here i’m using 0 as my thickness setting and making them all the same thickness, but you can play around with different thicknesses for each color which will change how the finished cane will look.
Then create a template at your desired dimensions for the loaf, for this example, I cut out a 1.5 x 4 inch template out of paper. Use this template as a guide in order to cut each sheet of clay so that they are all the same size.


After that, you want to stack them on top of each other in a color arrangement that is pleasing to you.
Next you want to reduce your loaf to get rid of any trapped air between layers and slice off one end of the cane so that you have one clean side to use for your future slices.
Step 2. Use Loaf Slices to Compile Jelly Cane
Now that you have created your loaf, you are going to uses the slices from it to create your jelly roll cane. So you’re using a cane to create another cane which lets you on your way to more advanced techniques — yay!
First grab your contrasting colored clay and run it through your pasta machine using a setting between the 4th and 6th thickness setting. Lay it down to use as a background strip and determine a length between 3 to 6 inches long. This will affect how wide your cane will be. I’ll be using around 4 inches for this example.
Then cut uniform slices from the loaf with a clean and sharp tissue blade. How thick you cut the slices will affect the size of the layers and change how the finished cane will look. Depending on the quality of the tissue blade you’re using you may some difficulty, but this one I got from Amazon works amazingly well and i’ll link in the description. I’m using it to cut a softer clay brand which is Fimo Soft. It works really well for square canes and cuts thin without warping the clay.
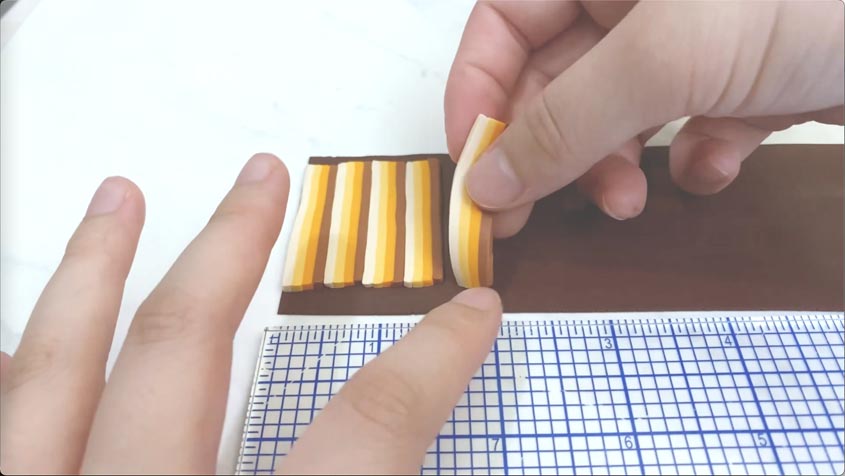
After cutting your slices, lay each slice next to each other side by side with the striped pattern alternating along your thin strip of contrasting background clay.

After you are done laying down the loaf slices, cut off any excess clay from the sides so that the background layer is the same size as the layer of loaves above.
Step 3: Roll The Sheet Into The Jelly Cane
The last step is to roll your cane.
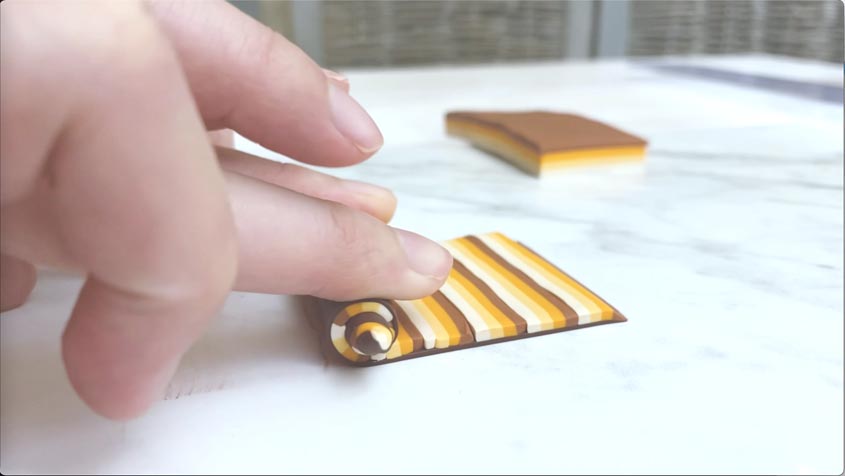
First cut a 45 degree angle along each end of your clay sheet. This will make rolling the loaf a lot easier from the core, and sealing it at the end.
Next, identify where you want to start the core of your jelly cane. Bend the edge of the background strip up and over to form a curl. Continue to roll the entire strip of striped clay until you are satisfied with the number of rotations in the cane.

Now you have your newly created jelly roll cane! There are many ways you can use a jelly roll cane to create veneers, decorate furniture and build other shapes out of them. For example, i’m considering creating more of these and morphing them into quirky butterfly wings and compiling multiples of these canes together to produce an assembled butterfly cane. Let you imagination run wild and have fun with this project!
Thank you for watching until the very end, if you enjoying my videos, please hit the like button and i’ll see you next time.
Did you find this helpful? Get notified of new content releases:
Sign up for News or Notifications

