Jennifoo

Polymer Clay, DIY & Gifts

Sign up for polymer clay tips & DIYs

Archives for 2021

How to Protect Your Clay Work Surface For $2

February 4, 2021 by jennifoo

Did you know you can protect your work surface for less than $2 with a trip to your local hardware store? A glazed ceramic tile with a smooth or matte surface is the best work and baking surface. The reason why you want to protect your work surface is because the plasticizers in polymer clay can leech out and damage some surfaces like wood and some plastics.

You may continue reading, but if you’re like me who prefers to listen and see, you can watch in video format:

Subscribe to my Youtube Channel for daily videos here.

Benefits of Ceramic Tile

  • Most glazed ceramic tiles are completely smooth, so it won’t leave textures in your clay. You can also find smooth matte tiles and it’s advantageous to have both.
  • Clay sticks to glossy surfaces, and you can use that to your advantage in projects where you need the clay to stay put, then easily lift the clay up with scraper.
  • Matte ceramic is less sticky and can be handy when caning or molding clay and don’t want it to stick to the surface you’re working on.
  • They are stable work surfaces that don’t bunch up when trying to roll your clay and won’t slip around.
  • They are scratch resistant which is super helpful when using your xacto knife or blades to cut the clay.
  • Ceramic tiles are mobile and can be easily moved around, which makes it a breeze to switch from different projects at different stages and clear out your desk if you need to take a break from working or do something else.
  • They are convenient: you can just pop them into the oven when you’re done with the clay. 
  • It’s the best baking surface because ceramic retains and allow the heat to distribute evenly across the surface which is an indispensable tool when dealing with ovens prone to temperature fluctuations.
    • Keep in mind that the side touching a glossy surface will bake shiny, so if you don’t want that you can put parchment paper underneath for a more matte finish.

When starting out with polymer clay, you can use a glossy ceramic when you want the clay to stick to the surface and switch over to a piece of parchment paper or matte ceramic when you don’t need the clay to stick.

Where to get Ceramic Tiles

You can get them at your local hardware store!

  • I use wall tiles from Lowes: an 8 x 16 and a several of 6 x 6. The larger one only costs $1.90 and the smaller ones were .80 cents each. Lowes will allow you to buy single pieces, but some stores will not.
  • It might save some time to call ahead or ask the sales associate in the area if they can give you an SKU number for purchasing them individually.
  • Sometimes in my video you’ll also see me using a large 12 x 23.5 matte ceramic for those bigger projects.
  • Don’t use 4 x 4s as they may be too small to work with.

Did you find this helpful? Get notified of new content releases:

Sign up for News or Notifications

Playlist on Polymer Clay Beginner Tutorials

Playlist on Polymer Clay Cane Tutorials

Filed Under: Beginner Polymer Clay Tutorials

Liquid Sculpey vs Fimo Liquid vs Kato Polyclay

February 3, 2021 by jennifoo

A guide helping you decide which liquid clay is right for your project.

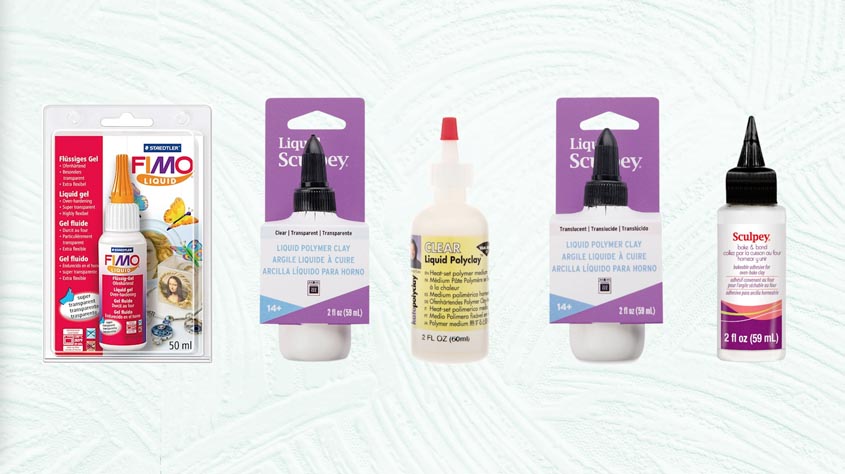
assortment of liquid clays

In this guide, I compare and contrast all the common liquid clays by describing their differences in order to help inform which is the right one for your project. You can also learn more about liquid clay in general such as their uses and where to buy it, by clicking this link.

You may continue reading, but if you’re like me who prefers to listen and see, you can watch in video format:

These ratings below are based on a system I put together to make it easy to compare the differences in relation to the clays featured in this guide.

Before you compare the liquid clays, it is helpful to consider the following points:

  1. Learn the difference between translucent or clear liquid clay:
    One of the first place to start, is to determine if you want a translucent or clear liquid clay. Translucent liquid clay is great is you want to create multi-layered effects because it’s semi-transparent, while clear liquid clay is great if you want to create a glass-like appearance where you can see details through it because it’s almost 100% transparent.
  2. Determine what you are using the liquid clay for:
    Next, is determining what you are using the liquid clay for. And if you haven’t already watched my “what is liquid clay used for” video, I would highly recommend watching that because it goes over the potential possibilities for what you can do with liquid clay. 

Do you want something multi-purpose for maybe conditioning crumbly clay and as an art medium, or do primarily want to use it as an adhesive that cures with a strong bond that is reliable across most clay brands? The varying degree of thickness, clarity, flexibility will determine which liquid clay is best for the job and i’ve listed out all traits to make it easy for you guys to compare all the common liquid clay brands. So keep reading on!

Liquid Clay Brands

Below is a list of liquid clays and their attributes.

  1. Tint is the undertone
  2. Clarity is how clearly you can see through the cured clay.
  3. Viscosity is the level of thickness. If it’s rated low it means it’s not very thick and is quite runny.
  4. Flexibility is how bendable the clay is when cured. How far can you bend it without snapping?
  5. Bond Strength is how strongly it bonds pieces of clay together. A high bond rating means that, when cured, the clay pieces will bond well and would be very difficult if not impossible, to pull part.

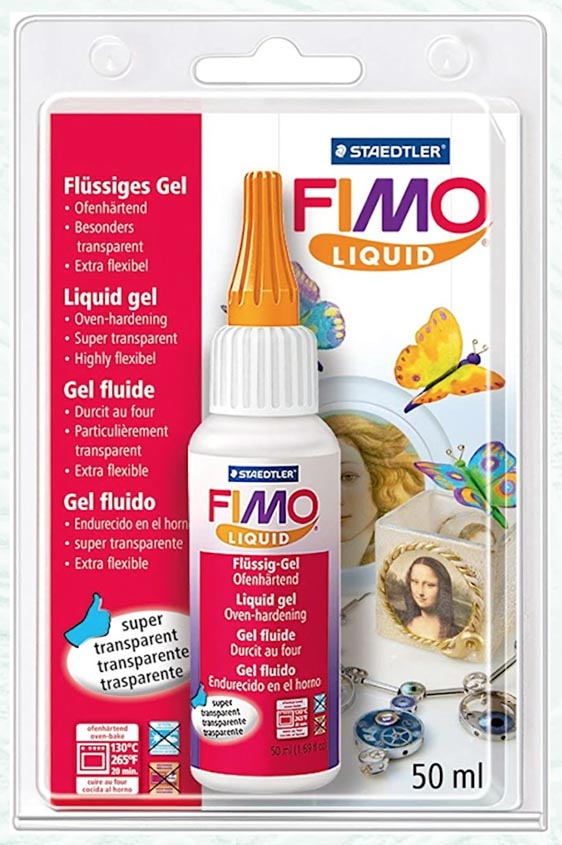
Fimo Liquid (Fimo Liquid Deco Gel) 

fimo liquid in packaging
  • Tint: white, if any
  • Clarity: (4.75/5) ***Probably the clearest clay when baked at 265ºF, but is 2nd to Sculpey clear when baked at 300. It can also have visible grainy particles.
  • Viscosity: (1/5)
  • Flexibility: (5/5)
  • Bond Strength: (4.5/5) ***While it cures with a strong bond, it might be trickier to use because it’s not as thick. Thicker clays may be easier to work with by preventing clay pieces from slipping around as you are constructing, but when it does bond, the bond itself is one of the strongest out of all liquid clays.
  • Finish: matte/satin  ***Extremely thin layers will provide a matte finish, and thicker layers create a satiny gloss finish.
  • Usage: Strong adhesive to bond clay pieces across all clay brands. However, it’s not very thick which just means your clay pieces might slip around as you are constructing your piece. It can also be used as an art medium depending on required attributes (so if you need something that’s very clear for your craft project, this is a great choice) as well as using it as a conditioner for  crumbly clay.
  • Details:
    • It is highly flexible after baking.
    • Works well across the majority of clay brands in creating a strong bond for combining clay pieces. 
    • While it cures with a strong bond, it might be trickier to use because it’s not as thick which is why it’s at a 4.5 rating instead of 5. You’ll find that thicker clays might be easier to work with in terms of preventing clay pieces from slipping around as you are constructing your piece.

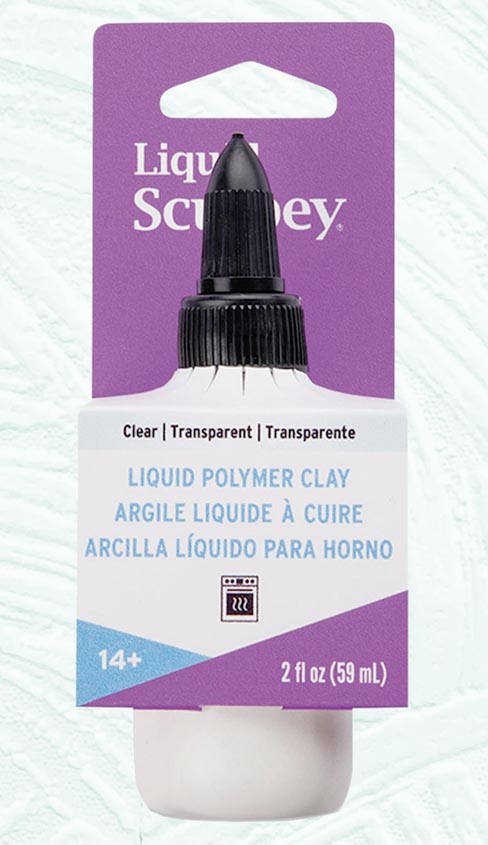
Clear Liquid Sculpey 

clear liquid sculpey in packaging
  • Tint: white, if any
  • Clarity: (4.75/5) ***It’s one of the clearest liquid clays available and gets even clearer when followed by a heat gun after baking at 265 degrees.
  • Viscosity: (1/5) 
  • Flexibility: (5/5)
  • Bond Strength: (3/5) ***The bond strength is average like most liquid clays with Fimo being the exception.
  • Finish: satin/glossy ***it’s glossy when cured with a heat gun
  • Usage: It can be used as an Art medium depending on required attributes and as a conditioner for crumbly clay. So if you need something that cures very clear and can double up as a clay conditioner, this is a good choice. It also tends to be a bit cheaper and readily available in craft stores than Fimo.
  • Details: 
    • make sure to stir if before every use since the ingredients settle quickly.

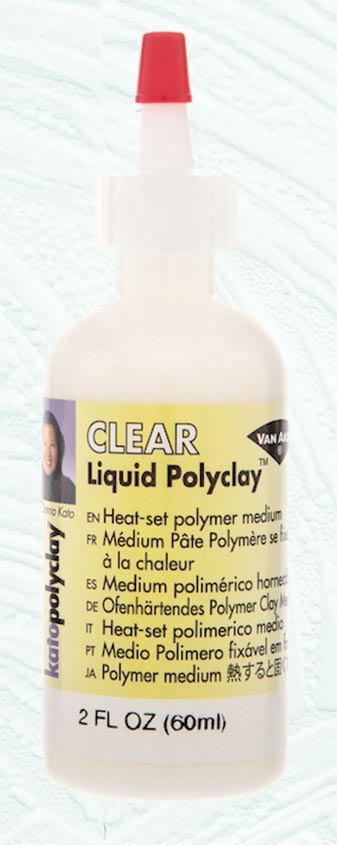
Kato Liquid Polyclay

kato clear liquid polyclay bottle
  • Tint: slight yellowish
  • Clarity: 4/5) ***This one is less clear than the 2 previously mentioned liquid clays.
  • Viscosity: (3/5) ***It’s also thicker than the 2 previously mentioned liquid clays.
  • Flexibility: (5/5)
  • Bond Strength: (3/5) ***The bond strength itself is also average, but the medium thickness may give it some advantage in the construction process  b/c it’s not as slippery. The thicker the clay, the less runny and slippery it is. 
  • Finish: satin/gloss ***glossy when cured with a heat gun. It cures even glossier than Clear Liquid Sculpey.
  • Usage: Good as adhesive or conditioner and an art medium depending on required attributes.

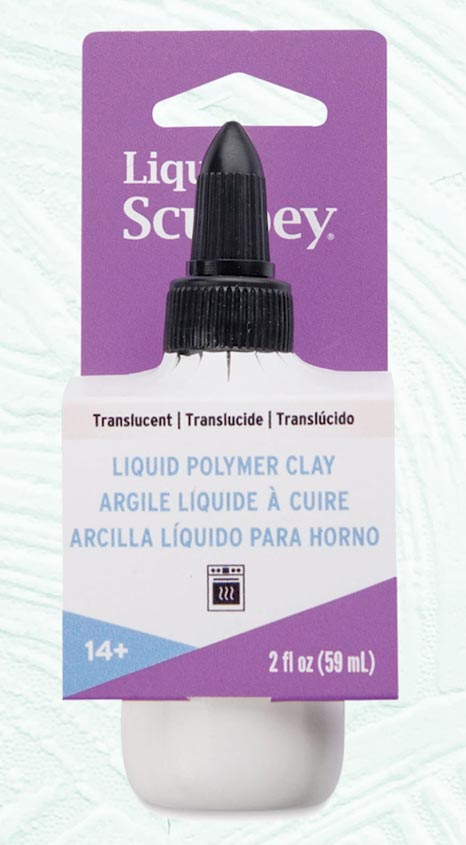
Translucent Liquid Sculpey (TLS)

translucent liquid sculpey in packaging
  • Tint: slight yellowish
  • Clarity: (2/5) ***It’s cloudy when cured.
  • Viscosity: (4/5) ***One of the thickest of all liquid clays with a syrupy consistency, but not as thick as Sculpey Bake and Bond. (if you need to thin it, you can add a small amount of “Sculpey Diluent which also Clay Softener”).
  • Flexibility: (1/5) ***Cures hard and firm
  • Bond Strength: (3/5) ***So it’s pretty average as far as bond strength
  • Finish: matte
  • Usage: It’s great as an Art medium for producing multi-layered effects and as a conditioner for crumbly clay.

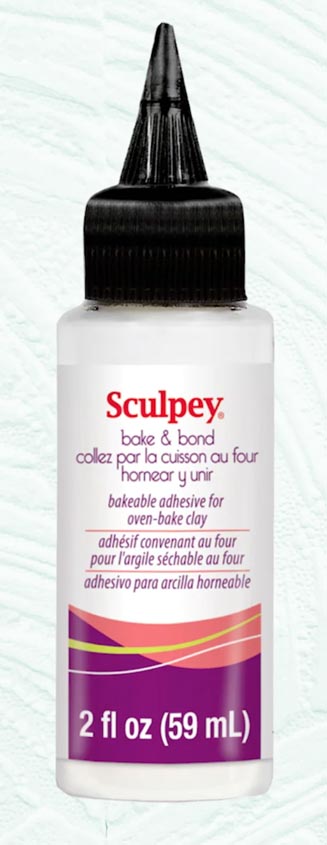
Sculpey Bake and Bond 

So let’s talk about Sculpey Bake and Bond for a minute, while it’s not labeled as liquid clay, it is actually just a thicker version of liquid clay. It is however, best used as an adhesive to bond things to clay because of its thickness and stickiness.

sculpey back and bond bottle
  • Clarity: 2/5 ***It’s cloudy when cured. It will be visibly seen, so it’s best to use moderate amounts when securing pieces together with it, and apply inconspicuously.
  • Viscosity: (5/5)
  • Bond Strength: (3.5/5) ***While it doesn’t bond more strongly than any of the other liquid clays. The advantage of using this as an adhesive is that its extra thickness, prevents it from dripping and the stickiness prevents parts from slipping around while trying to attach parts together.
  • Usage: it’s meant to be used as bakeable adhesive to attach clay or other media to clay pieces like metal ***Remember that liquid clay doesn’t work like glue, you have to bake it to cure the bond.
  • Not Good For: conditioning clay or using at an art medium ***It’s not good for conditioning solid clay because of it’s thickness and stickiness.
  • Details:While it doesn’t bond more strongly than any of the other liquid clays. The advantage of using this is that it’s easier to use as an adhesive, because of its extra thickness, stickiness and the fact that it doesn’t drip like other liquid clays. This allows for pieces of clay or even other mixed media like metal, to stay put and being less likely to slip around when being attached to clay piece. 

Recommendations:

  • Always stir your liquid clays to ensure the material are mixed well.
  • Using a heat gun (accidentally said glue gun in video) will help liquid clay become more clear, except in the case of Translucent Liquid Sculpey.
  • You can add drops of clay softener to liquid clay for added flexibility and strength.

Use liquid clay as a bonding agent:

  • The liquid clay brand I recommend as a bonding agent for clays is Fimo Liquid.
    • Generally Fimo Liquid works best to bond clay pieces together across most brands of clay wether it’s raw to raw, baked to baked, or raw to baked.
  • Some other technical things to keep in mind:
    • Raw to raw adhesion is strongest when you use a bonding agent even though some clay brands like Cernit or Fimo Professional may work fine without it.
    • If you’re doing baked to baked and find that just using liquid clay isn’t enough, you can create a raw bridge (which is essentially a connector piece out of clay) when applying the liquid clay to connect them together.

Did you find this helpful? Get notified of new content releases:

Sign up for News or Notifications
Playlist on Polymer Clay Beginner Tutorials

Playlist on Polymer Clay Cane Tutorials

Filed Under: Beginner Polymer Clay Tutorials

What is Liquid Clay Used For & Where to Buy it?

February 2, 2021 by jennifoo

General applications for liquid clay

You might have visited the craft store once and saw this little white bottle hanging on the shelf labeled liquid clay. And you might have wondered, what the heck is this for if there’s already solid clay and there’s already clay softener on the market, why would I need this?

Well, hold your creative socks, my friend, there is so much you can do with liquid clay.

First let’s take care of the elephant in the room and answer the question “what is liquid clay”? Liquid clay is just polymer clay in the form of liquid, that’s all it is to it. End of tutorial, just kidding.

You may continue reading, but if you’re like me who prefers to listen and see, you can watch in video format:

Subscribe to my Youtube Channel for daily videos here.
  • Liquid clay mimics regular clay in terms of how you bake it and the result is also strong and flexible. However, you can do some extremely useful and wonderfully creative things that would be difficult or near impossible to achieve with just solid clay in your arsenal.
  • Liquid Polymer Clay is generally known to be used as an adhesive to bond pieces of clay together (wether its raw to raw, baked to baked, or raw to baked) and it’s often used as a way to help condition and soften crumbly clay because liquid clay contains plasticizer. And if you watched my previous video on polymer clay safety, you learn that plasticizer is what holds the clay together, softens it and makes it pliable.

Now that i’ve discussed some of the general applications for liquid clay. Let’s go into some of the more creative and fun things you can do with it!

Creative applications for liquid clay

  • You can use liquid clay to make image transfers
  • As a sealer for many different media such as foils, leafing, transfers and beads.
  • Laminating paper
  • As a glaze or grout in projects.
  • You can use it one it’s own or combine it with solid clay, or in conjunction with other media. For example you can coat regular clay with liquid clay and apply iridescent flakes to create a faux opal effect.

Use liquid clay as a medium and an art form

You can think of liquid clay as an art form in its own right to create faux effects, layers of textures and patterns.

  • Some examples include:
    • Making charms, pendants, hair clips, bracelets, mosaics, butterfly wings, book covers, beads, flexible patterned sheets to fit into bezels, decorative tiles wether big or small, mirror & window clings, and other various shapes by pouring them into mold to create jewelry and pieces for home decor. 
  • Other special effects can be created by mixing liquid clay with the following:
    • mica powders, microbeads, sand, glitter, sequins, tinsel, metal flakes, dried flowers, spices, fibers, small metal objects, and much more.
    • In terms of ratio, a good rule of thumb is do 3 parts liquid clay and 1 part custom medium for your special effects. If there’s too much custom medium, it may change how the clay behaves once cured so you don’t want to go overboard.

Difference between translucent liquid vs clear liquid 

Ok so I wanted to go over this because I remember standing in the craft store squinting at the words “translucent” and “clear” and could not figure out the difference.

  • Translucent liquid is semi-transparent and is often used to create multi-layered effects. I think the easiest way for me to describe this is to think of a raw gemstone with dimensional texture where you can see additional details beneath the surface layer, but not completely see through it. When tinted, you can create faux ceramic effects and translucent liquid also works better for image transfer because it is slightly opaque.
  • With clear liquid clay, it creates more of a glass like effect. So for projects where you want to see through the clay, you would use this. Also, some people like to use this as you would use resin to encase an art form or small object.

Tinting liquid clay

While some liquid clay brands comes in different colors, you can also tint liquid clay. You can tint liquid clay by mixing it with any of the following: oil-based paint, alcohol inks, pastel chalk, or pigment powder by adding a few drops at a time until the desired effect is achieved. 

Alcohol inks must sit on top of the liquid clay until it evaporates before you mix the color.

Applying Liquid Clay

To apply liquid clay, you can pour directly from the bottle, use a fine tip extension for precise application, or you can the flat end of a toothpick to dab clay onto the surface.

For detailing, use the pointy end of the toothpick, needle, metal stick, or thick wire to drag the clay to create swirling textures or shapes. You can also use your fingertips or a synthetic brush dedicated for liquid clay usage. If the liquid clay is too thick, you may apply thiner or clay softener.

To remove liquid clay use a Q tip with 70% rubbing alcohol.

Where to Buy Liquid Clay:

Generally you can buy liquid clay in your local craft store like Hobby Lobby or Michaels. They generally range from $9 – $12. If you don’t find your desired liquid clay there, you can go online and I like to use Amazon as my next resource.

I will go into a more comprehensive study on each of the popular liquid clays and the differences in my next tutorial, but here are some of the ones I recommend, the cost, and where to get them:

Disclaimer: This post contains affiliate links, which means I may earn a commission if you choose to make a purchase through my link (with no extra cost to you). Thank you for your support.

  • Fimo Liquid Clay is also known as Fimo Deco Gel, is one of the clearest liquid clays and currently sells on Amazon for a little less than $12 for a 1.69 fl oz bottle. And this is the best liquid clay for bonding pieces of clay together and it’s even better than Sculpey Bake and Bond.
  • Clear Liquid Sculpey is also one of the clearest liquid clays (second to Fimo Liquid Clay) and they come in 2fl oz bottle. Buy Clear Liquid Sculpey Now.
  • Translucent Liquid Sculpey which is great for creating multi-layered effects can be purchased at Hobby Lobby or Michaels for $9 for a 2fl oz bottle. Buy Translucent Liquid Sculpey Now.
  • Kato Poly Clay is a great economical choice to use as an art medium or conditioner and it dries pretty clear, but not as clear as Fimo Liquid and it can be purchased at Hobby Lobby or Michaels at $7 for a 2fl oz bottle.

Did you find this helpful? Get notified of new content releases:

Sign up for News or Notifications
Playlist on Polymer Clay Beginner Tutorials

Playlist on Polymer Clay Cane Tutorials

Filed Under: Beginner Polymer Clay Tutorials

10 Polymer Clay Safety Tips You Need To Know Now

January 26, 2021 by jennifoo

Before you work on polymer clay it’s important to know these 10 tips to make your life easier.

You may continue reading, but if you’re like me who prefers to listen and see, you can watch in video format:

Subscribe to my Youtube Channel for daily videos here.

Storing polymer clay:

1. Don’t want goo? Avoid storing uncured clay in hard plastic containers.

Because believe it or not, uncured clay can melt plastic. You might end up with some sticky goo in your container, or the clay seems to be stuck to the plastic which is still pretty unpleasant. But now you’ll know what the heck that is, should that happen.

You might be wondering, “then why doesn’t it melt the plastic that the clay is wrapped in?” Read on for the answer!

2. If you’re going do plastic, store polymer clay in plastic that is compatible.

Uncured clay is incompatible with only specific type of plastics so the plastic it’s wrapped in, is of course compatible with the clay.

  • Plastics that have a recycling number of 2, 4 or 5 are usually fine for storage.
  • You want to steer clear of plastics numbers 6 and 7.
  • When in doubt, you can test it out storing a small piece of clay for 1 or 2 days to see if the container softens or gets sticky. 

One of the most convenient and cost-effective options to store polymer clay, is to place them in plastic sand-which bags and then label them for easy identification. I like to write the brand name and color mixture onto the bag with sharpie, and then house all the little bags with the same brands into a larger bag. Also you can wrap your clay in plastic wrap that isn’t polystyrene and then store it in any container.

3. Never leave uncured clay on furniture.

The plasticizer in polymer clay can ruin furniture in your house.

  • It’s best practice to never leave uncured clay sitting around for long periods of time on unprotected surfaces like tables or countertops, as well as painted, varnished, or lacquered surfaces.
  • Improper storage can ruin the clay or damage objects in your home that are made of wood or certain types of plastics. This is because polymer clay is bond together by what’s called “plasticizers” which is a chemical that makes plastic soft and flexible. This is also the reason why it may not play well together with other plastics.

Thou shall not harm furniture. Once the clay is baked, it is inert and chemically inactive and therefore cannot harm furniture.

Is Polymer Clay toxic?

4. Don’t eat from objects made with polymer clay.

  • While polymer clay is rated as nontoxic, you also can’t eat or drink from objects made of it so no, it is not certified for food contact, nor can you borrow things from your kitchen for clay usage.
  • Cured polymer clay is very porous and bacterial can use it as a breeding ground if food particles get stuck in pores, nooks, and crannies, and it’s almost impossible to clean adequately after using with food. Polymer clay is made for craft use, not as a food utensil so it’s not going to withstand sanitization methods like using hot water, disinfecting liquids and will break down after repeatedly using it in a dishwasher.
  • Another reason why baked clay should not come into contact with food because residual plasticizer can remain on the clay even after firing. However, you can use it for decorate food serving pieces where it doesn’t touch food directly like napkin rings, embellishing handles or the bases of stemware. You can also sandwich the clay between pieces of glass as long the clay doesn’t come into contact with food.

Now let’s talk about safety with clay tools

5. Keep kitchenware and polymer clay tools separate.

  • Kitchen tools used for working with clay should remain craft or clay dedicated. As a rule of thumb, once you use an object for polymer clay, set that aside for clay usage only and take it out of the kitchen so others do not accidentally use it for food. 
  • This is because it’s difficult or near impossible to remove all clay particles from some utensils like a pasta machine where it hides in nooks & crannies, and the plasticizer from the clay can remain on porous surfaces like plastic. (clip of pasta machine). 

Cleaning hands after working with polymer clay

6. Get rid of polymer clay residue on hands when you’re done working.

After working with clay there is usually some residue on your hands which soap and water will not remove. There are various products you have use to dissolve the clay on your hands, and then follow with ordinary dish soap.

  • You can rub some hand sanitizer to dissolve the clay residue. 
  • Another option is to use a pumice based, waterless hand cleaner.
  • If you don’t have that, rubbing alcohol is another option.
  • A more gentler option is to rub a little bit of olive oil onto your hands to break up the clay particles.

After dissolving the clay with any of the methods mentioned above, follow with soap and water to finish cleaning it all off especially before you eat or cook.

Baking Polymer Clay

7. When baking polymer clay, you never want to leave baking clay unattended.

  • If the clay appears to be smoking or burning, turn off the oven, remove the clay, place it outdoors until cool and ventilate the room.

8. Do not bake polymer clay at really high temperatures where it might burn at around 350 degrees F.

  • If you’re unsure if your clay is completely baked all the way, you can get away with baking the clay for longer periods of time or even raising the temperature 10-15 degrees higher, in fact, that can help strengthen the clay. However, be wary over temperature fluctuations that can occur with inexpensive ovens.
  • When baked as directed, the fumes are not toxic. However, at really high temperatures, it is close to burning or starts burning, it releases hydrogen chloride gas which can cause eye, nose or mouth irritation. Different brands will have different baking times, but from what i’ve seen, it ranges from 212F – 300F.

Protective Gear

9. While carving, dry sanding, machine buffing or drilling clay, wear safety goggles and use a dust mask.

  • You don’t want to pop your eye out because a piece of the clay went flying off the buffer at a really high speed.
  • Buffing/sanding can produce fine particles that can get into your lungs or eyes.

10. Instead of dry-sanding opt for wet sanding.

  • Wet sanding which not only prevents air-borne dust, but also minimizes the appearance scratch marks on your finished clay. Not having to deal with a thousand dust particles flying everywhere is a big plus! When sanding you can periodically dip the paper into soapy water or sand underwater. Soapy water using a bit of dish soap or detergent helps with lubrication for smoother sanding.

Did you find this helpful? Get notified of new content releases:

Sign up for News or Notifications
Playlist on Polymer Clay Beginner Tutorials

Playlist on Polymer Clay Cane Tutorials

Filed Under: Beginner Polymer Clay Tutorials

I’m New To This! What is Polymer Clay Exactly?

January 25, 2021 by jennifoo

Introduction to Polymer Clay

Polymer clay is a modeling compound that remains soft and malleable until heated in an oven. It is made of PVC and pigments which are bound together by plasticizer. Plasticizer is also what makes the clay soft and pliable until it is cured. Polymer clay is one of the most versatile and forgiving mediums available. It can mimic the appearance of metal, wood, fabrics, leather or even gems, but it’s also lightweight and affordable.

You may continue reading, but if you’re like me who prefers to listen and see, you can watch in video format:

Subscribe to my Youtube Channel for daily videos here.

What is Polymer Clay used for?

Polymer clay has a diverse fanbase, including children, professional artist and hobbyist in many different realms of craft such as modeling, jewelry making, fine art, professional craft, doll making, home decor, pottery, scrapbooking and sculpture.

If that’s not enough, some additional examples would be knitters can use polymer clay to create custom buttons, metal-smiths can make faux stones out of them like opal and turquoise, wood workers can make inlay and accents to add to their projects and handymen can use them for household repairs like filling cracked tiles or repairing furniture with a missing trim or decorative accent.

As you can see there is virtually no limit aside from where your creativity takes your with polymer clay. However, you can’t use it as kitchenware if it contacts the food. Don’t eat it or eat from it or eat from the items you use to work with the clay. It’s non toxic, but not edible.

Customizing Polymer Clay

Polymer clays are available in a wide range of colors that can be mixed together to produce an even wider color palette. You can even mix different brands of clay together to customize weight or consistency. There are also various techniques you can apply to polymer clay such as bushing on mica powder, applying foil, stamping with textured sheets, image transfers, marbling, silk screening and more.

How to Prepare Polymer Clay

Condition Polymer Clay

Before working polymer clay, it must be conditioned before you use it, because if you don’t it will be brittle. Kneading and warming the clay with your hands or a pasta machine allows the materials in the clay to mix evenly, which increases it’s pliability and reduces risk of breakage. Clay that is adequately conditioned will not crack when folded. If it’s been sitting untouched for a while, the ingredients will settle and have to be conditioned again.

Baking & Finishing

Polymer clay has to be cured in an oven including conventional, toaster, and convection types. It bakes at low temperatures, typically between 212F – 300F depending on the brand. Follow the temperature recommendations on the packaging. This allows you to bake it alongside materials that don’t burn or melt at these low temperatures such as paper, wood, frames, pens or mirrors. After baking polymer clay, it can be drilled, carved, sanded, buffed, glazed or painted.

Did you find this helpful? Get notified of new content releases:

Sign up for News or Notifications
Playlist on Polymer Clay Beginner Tutorials

Playlist on Polymer Clay Cane Tutorials

Filed Under: Beginner Polymer Clay Tutorials

Statement Earrings | Gorgeous DIY

January 4, 2021 by jennifoo

Polymer Clay Earrings

Create DIY statement earrings that instantly add personality and sophistication to any simple outfit which makes dressing up easy and effortless.

These hand-made earrings are made of polymer clay in a variety of styles. I choose the design these with sensibility to colors that would be versatile, yet stylish to work with many different types of outfits.

For this DIY, I use polymer clay from the brand Sculpey Premo.

Watch this video for a step by step how-to:

Amber Petal Earrings

Color mixture: sunshine, and ecru

Jaguar Black Slab Earrings

Color mixture: graphite pearl

Download polymer clay cutout shapes for the black slab earrings here.

Rustic Red Waterfall

Color mixture: cayenne, bronze, and gold

White Horizons

white polymer clay earrings with multiple lined texture
Color mixture: white and ecru

Golden Duet Hoops

polymer clay earring gold duo-tone hoops
Color mixture: ecru and white / gold

Did you find this helpful? Get notified of new content releases:

Sign up for News or Notifications
Playlist on Polymer Clay Beginner Tutorials

Playlist on Polymer Clay Cane Tutorials

Filed Under: DIY Crafts

  • « Previous Page
  • 1
  • 2
  • 3
  • Next Page »

Quick Links

  • Recommended Polymer Clay Tools & Supplies

Polymer Clay Tutorials

Polymer Clay Canning Tutorials

Beginner Polymer Clay Tutorials

DIY Crafts

white clay earrings adorned with pearls

Shop Gorgeous Handmade Earrings

Recent Posts

  • Dreamy Butterfly Canes & Amazing Clay Hack
  • Easy Peasy Beautiful Feather Canes
  • Fireball Explosion Canes | Easy Cane Tutorial
  • 7 Caning Tips You Need to Know Before Starting
  • How to Enlarge & Connect Polymer Clay Designs
  • Boho Gifts Guide For the Quirky Free Spirit (Gifts For Her)
  • How to Effectively Clean Your Pasta Machine
  • Cute, Classy & Chic Gifts Guide (Classy Gifts She’ll Love)
We use cookies on our website to give you the most relevant experience by remembering your preferences and repeat visits. By clicking “Accept All”, you consent to the use of ALL the cookies. However, you may visit "Cookie Settings" to provide a controlled consent.
Cookie SettingsAccept All
Manage consent

Privacy Overview

This website uses cookies to improve your experience while you navigate through the website. Out of these, the cookies that are categorized as necessary are stored on your browser as they are essential for the working of basic functionalities of the website. We also use third-party cookies that help us analyze and understand how you use this website. These cookies will be stored in your browser only with your consent. You also have the option to opt-out of these cookies. But opting out of some of these cookies may affect your browsing experience.
Necessary
Always Enabled
Necessary cookies are absolutely essential for the website to function properly. These cookies ensure basic functionalities and security features of the website, anonymously.
CookieDurationDescription
cookielawinfo-checkbox-analytics11 monthsThis cookie is set by GDPR Cookie Consent plugin. The cookie is used to store the user consent for the cookies in the category "Analytics".
cookielawinfo-checkbox-functional11 monthsThe cookie is set by GDPR cookie consent to record the user consent for the cookies in the category "Functional".
cookielawinfo-checkbox-necessary11 monthsThis cookie is set by GDPR Cookie Consent plugin. The cookies is used to store the user consent for the cookies in the category "Necessary".
cookielawinfo-checkbox-others11 monthsThis cookie is set by GDPR Cookie Consent plugin. The cookie is used to store the user consent for the cookies in the category "Other.
cookielawinfo-checkbox-performance11 monthsThis cookie is set by GDPR Cookie Consent plugin. The cookie is used to store the user consent for the cookies in the category "Performance".
viewed_cookie_policy11 monthsThe cookie is set by the GDPR Cookie Consent plugin and is used to store whether or not user has consented to the use of cookies. It does not store any personal data.
Functional
Functional cookies help to perform certain functionalities like sharing the content of the website on social media platforms, collect feedbacks, and other third-party features.
Performance
Performance cookies are used to understand and analyze the key performance indexes of the website which helps in delivering a better user experience for the visitors.
Analytics
Analytical cookies are used to understand how visitors interact with the website. These cookies help provide information on metrics the number of visitors, bounce rate, traffic source, etc.
Advertisement
Advertisement cookies are used to provide visitors with relevant ads and marketing campaigns. These cookies track visitors across websites and collect information to provide customized ads.
Others
Other uncategorized cookies are those that are being analyzed and have not been classified into a category as yet.
SAVE & ACCEPT

Get creative inspiration and updates from Jennifoo right to your inbox.